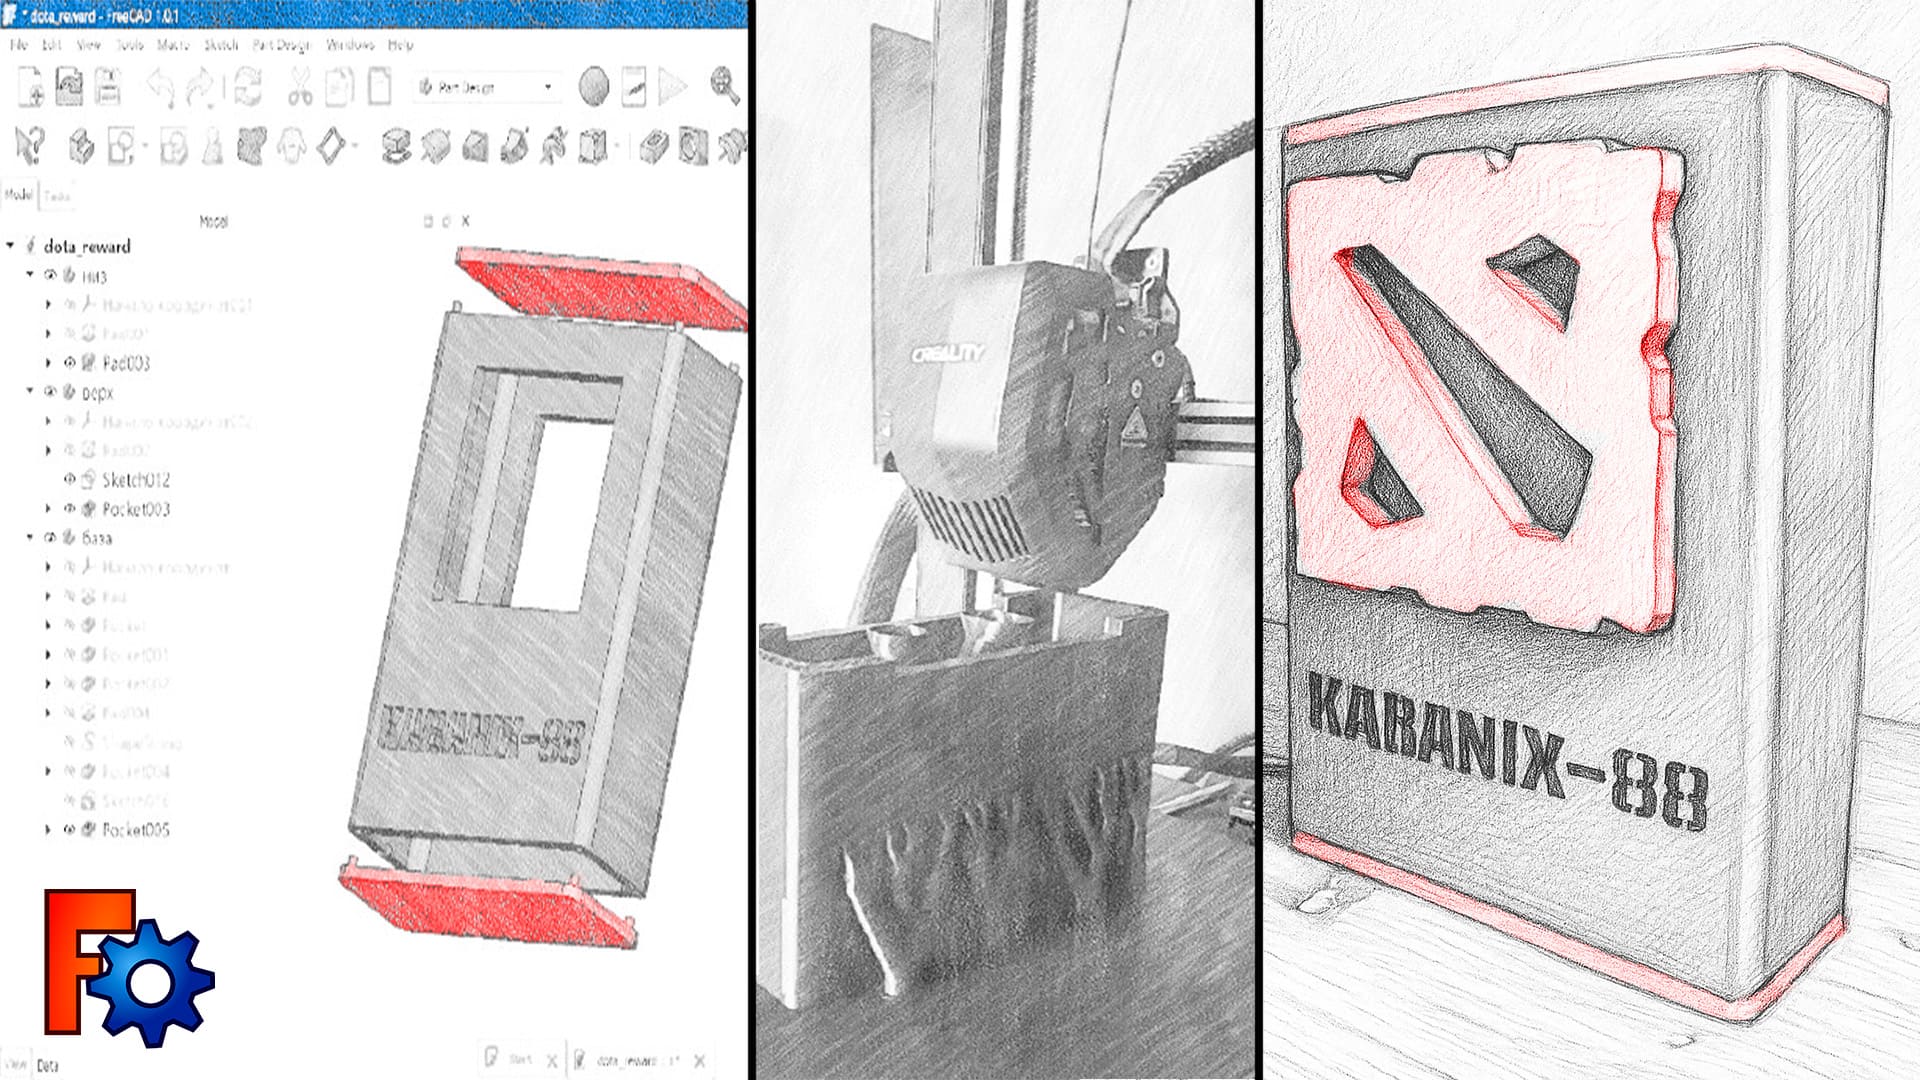
Creating a Dota 2 Reward (FreeCad -> Creality Print -> Manual assembly)

Hello everyone, today I want to tell you about my first experience of a full-fledged 3D project. I recently got the Creality Ender 3v3 SE 3D printer, which is a very easy-to-use and inexpensive option for those who want to try their hand at 3D printing. At first, I tried different printing settings, choosing models on well-known sites. So I got figurines, vases, hooks, toys and many other interesting things at home. Over time, I realized that I can't do without the skill of 3D modeling. There are many ideas and plans that cannot be found on the Internet.
I needed a simple program in which I could model objects with specific sizes in a few keystrokes. I looked at Blender for a long time, but eventually settled on, as it seems to me, a simpler program, FreeCAD. But we'll talk about that later...
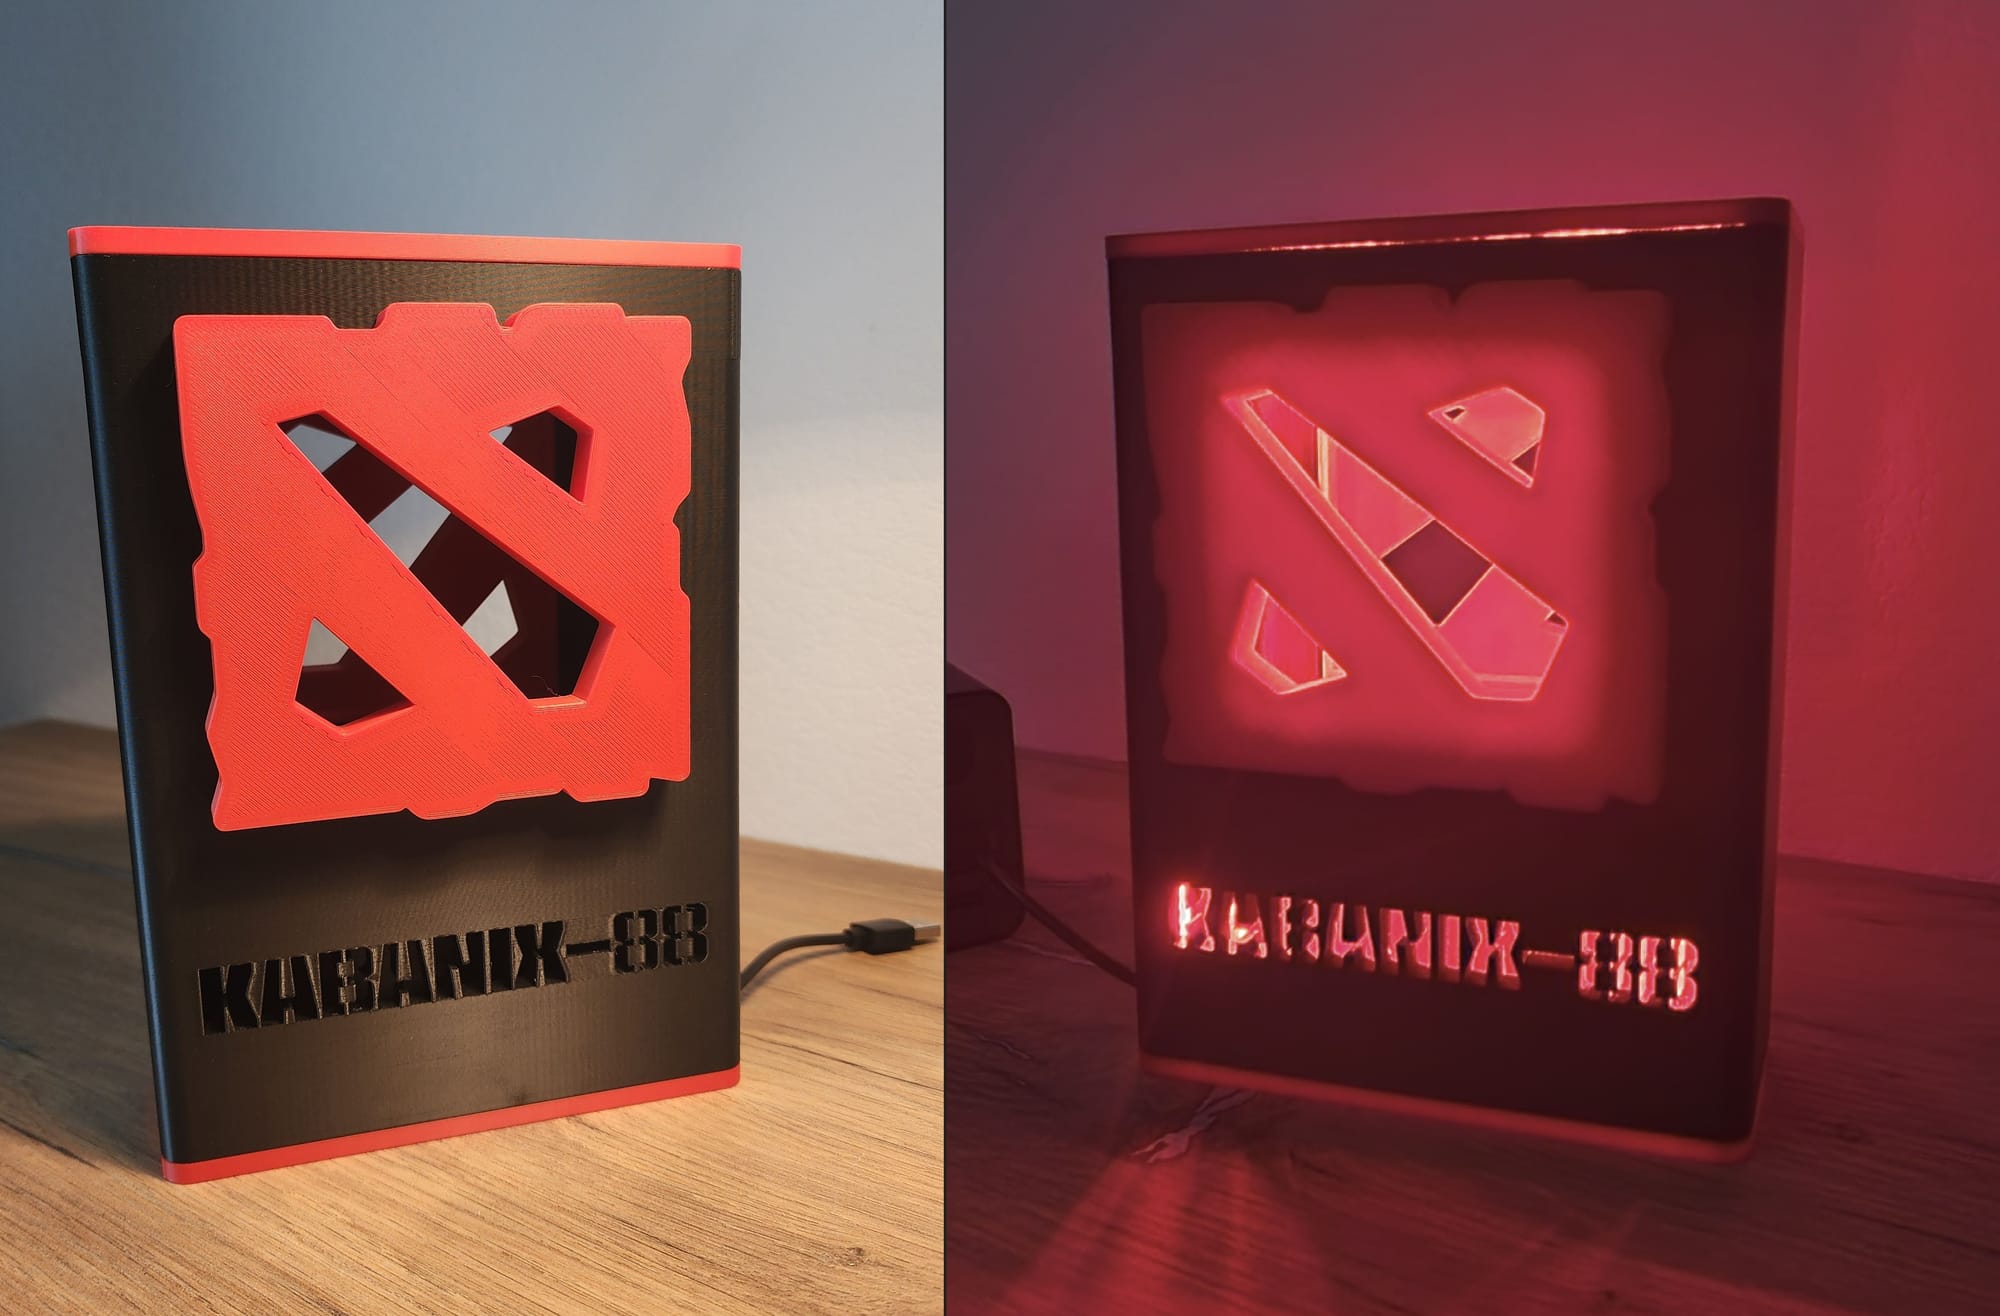
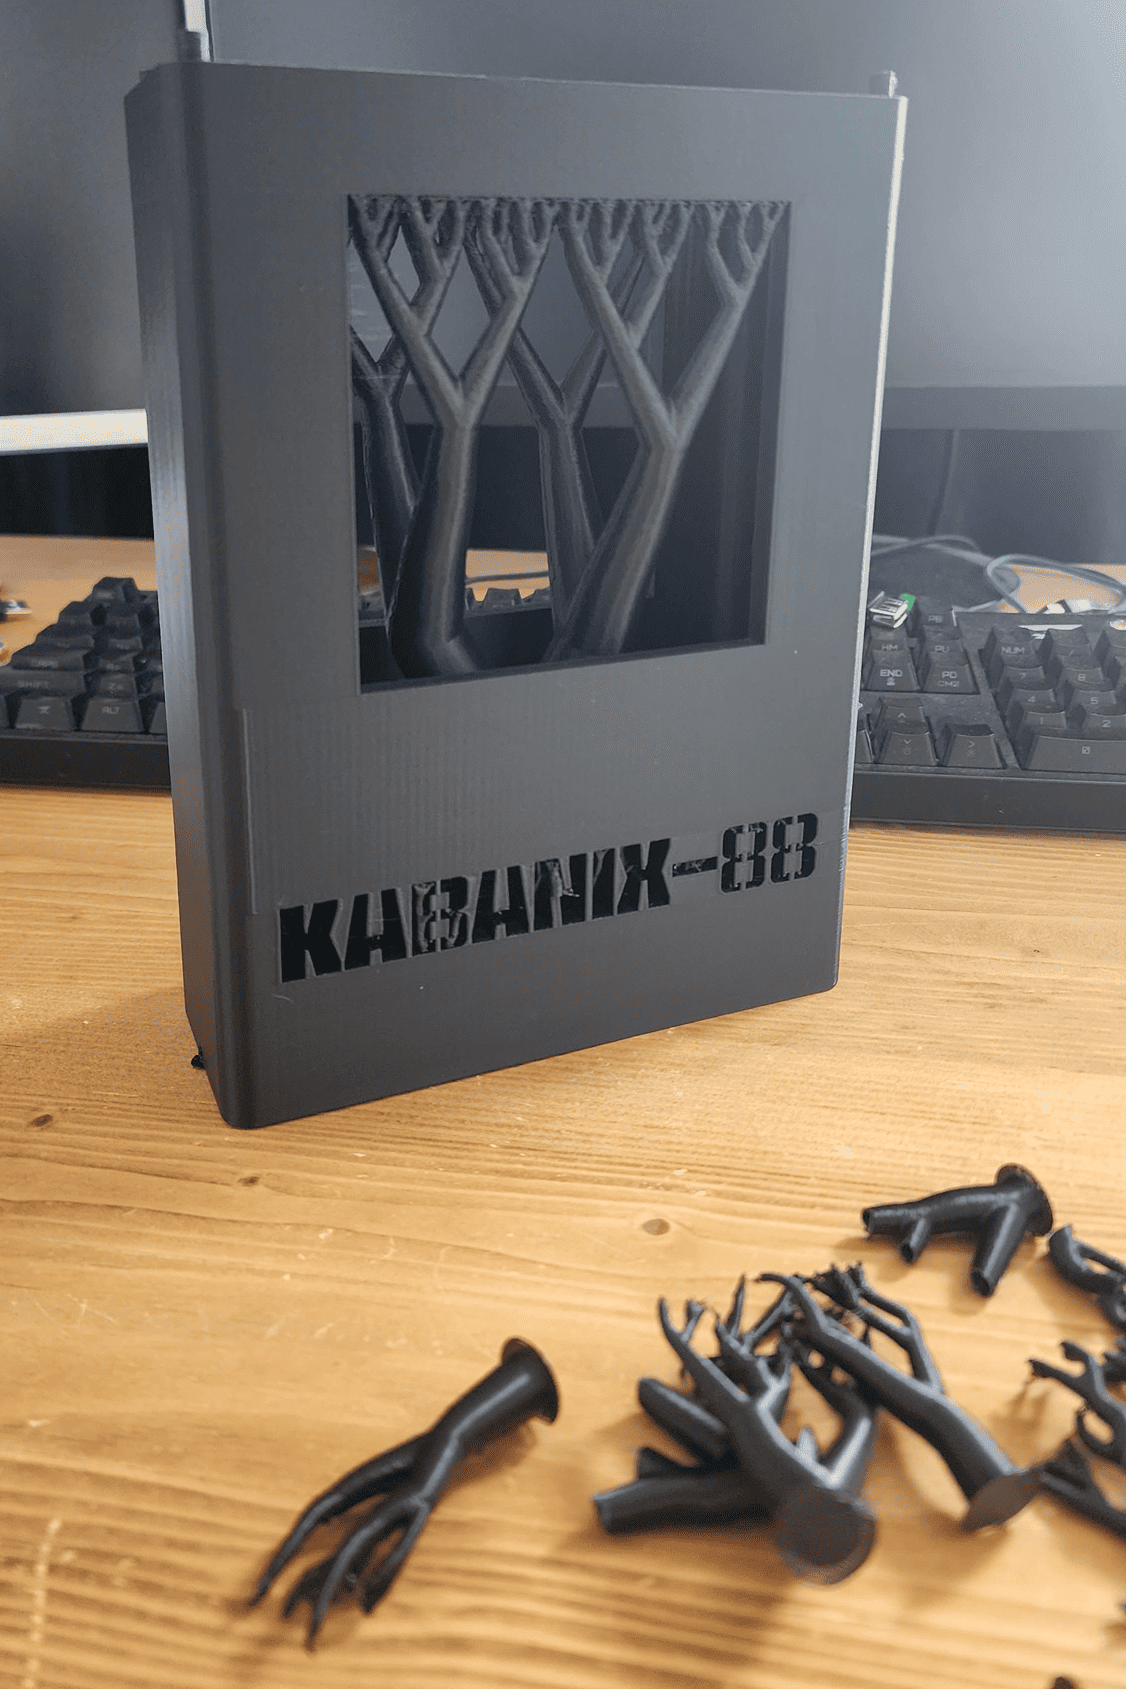
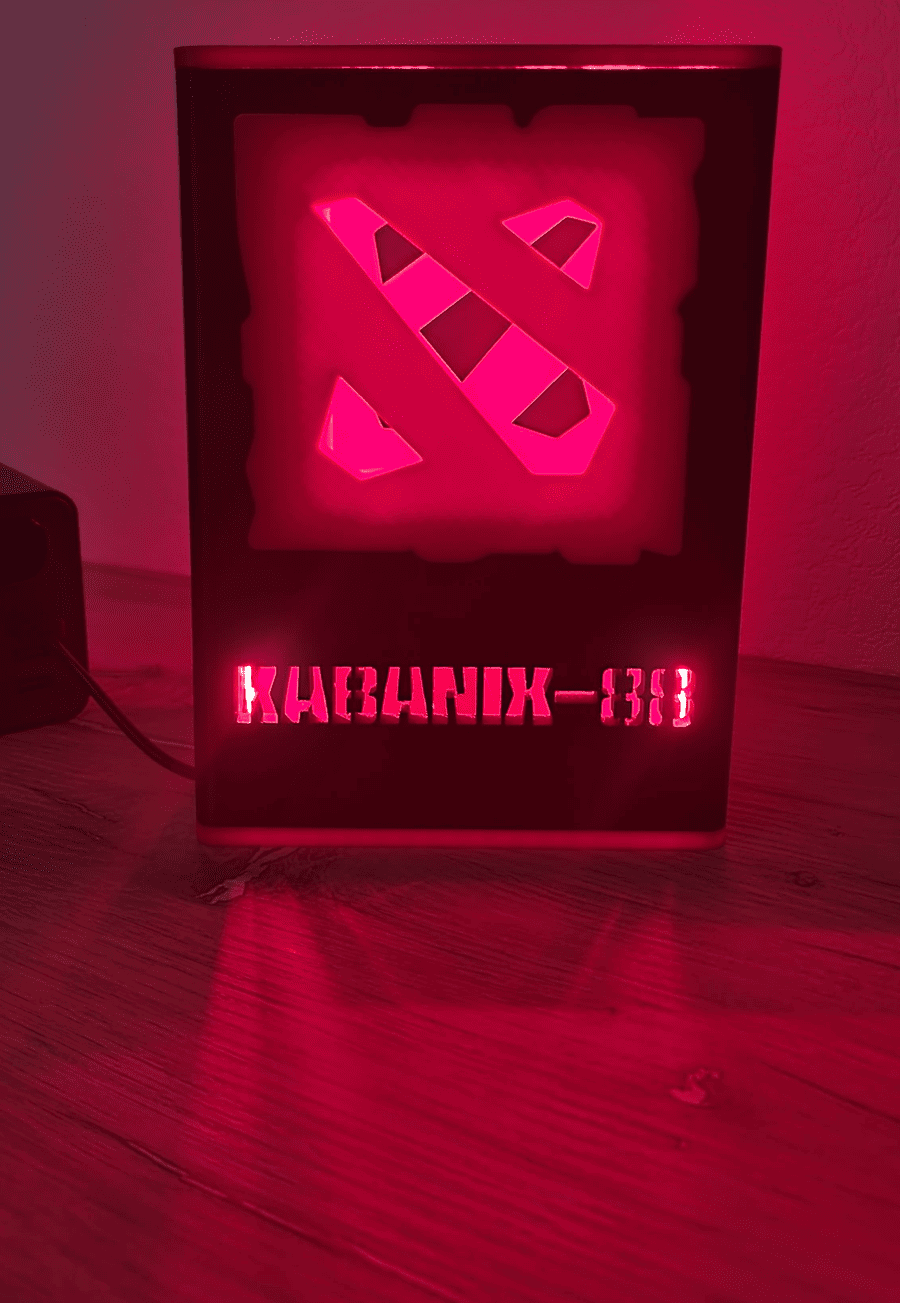
So, this story started a month ago. I have a friend with whom we sometimes play Dota 2 together. And of course, he does it better than me, considering that his birthday is in July, I decided to give him something unusual. As you probably already understood, this is a Dota 2 reward with his nickname in the game. Although it's something in between a reward and a lamp😂 Here's the result I got:
So how did I do it? 😏
FreeCAD is a very simple simulation program if you understand how to work with it. Now, of course, I can easily model almost anything, but it's been a really long journey. FreeCAD has the most illogical menu, and the most illogical functionality. So it seemed to me, although everything seems cool now, maybe FreeCAD has ruined me? 😅
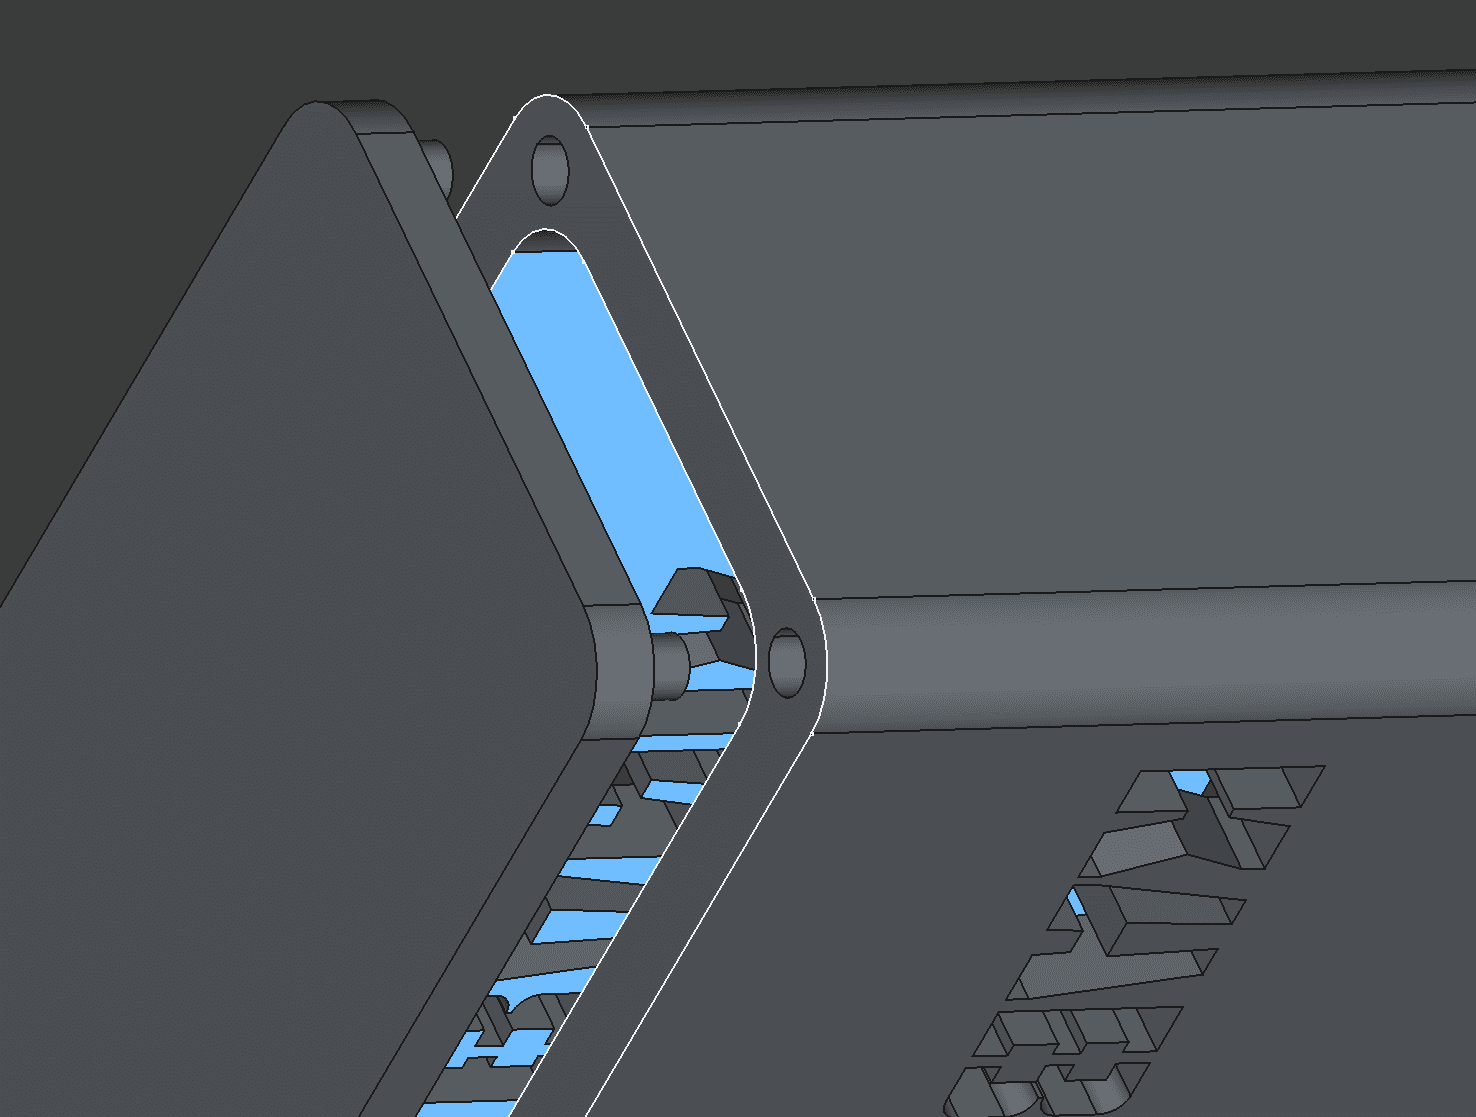
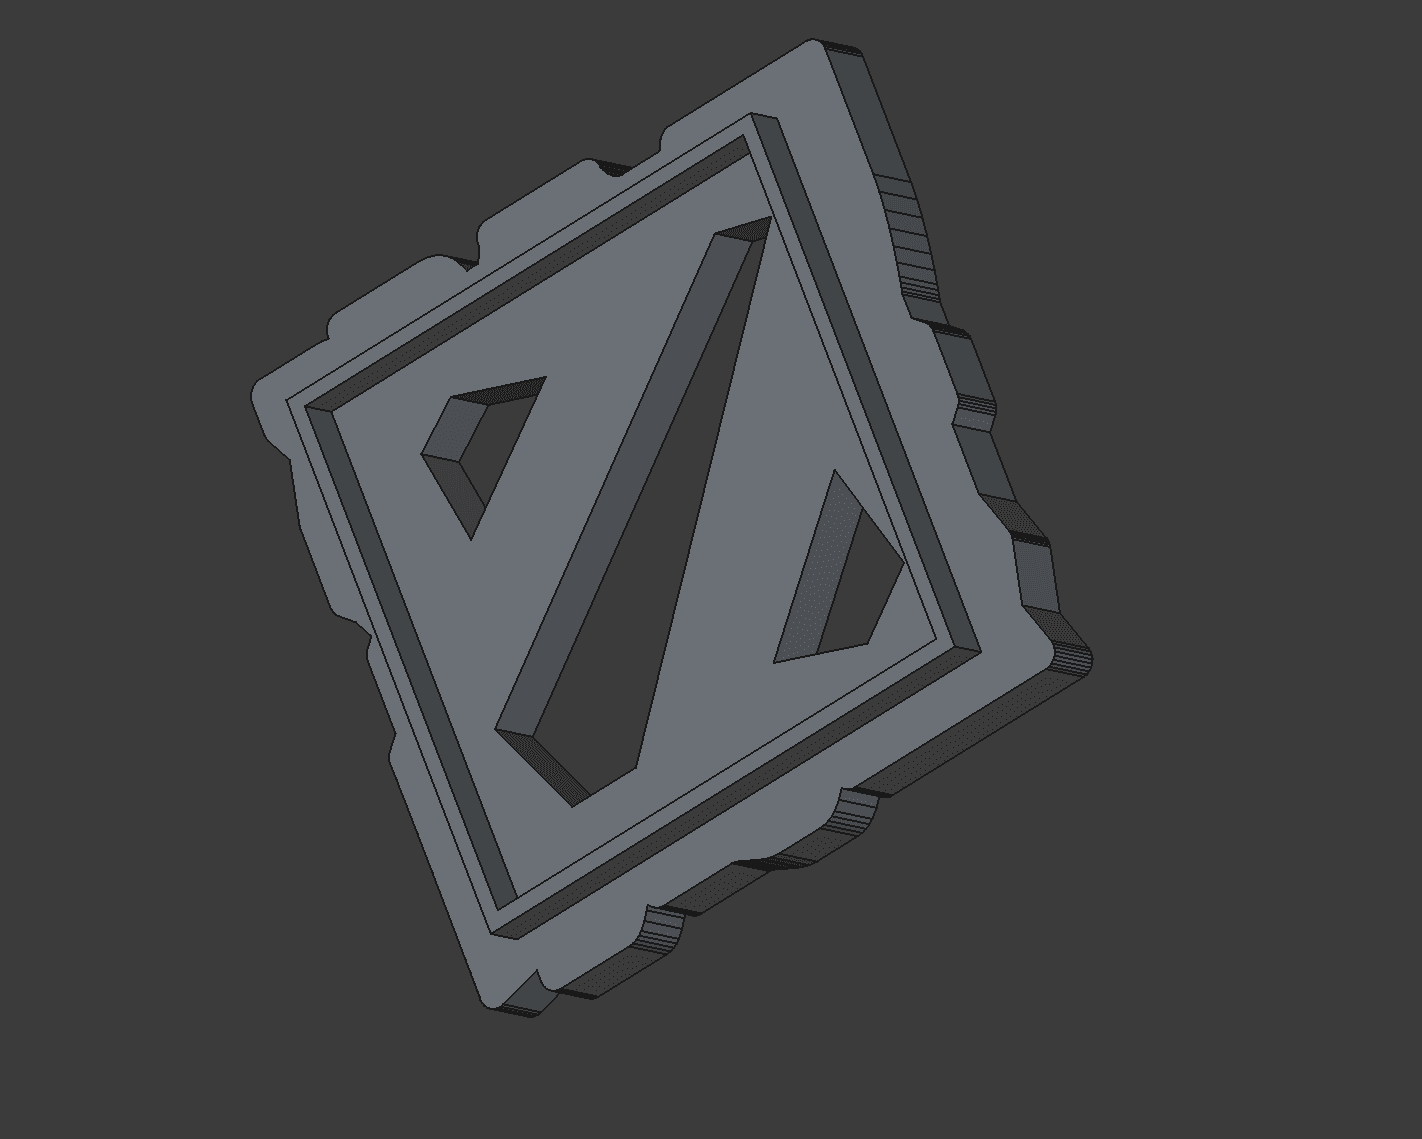
There are only five parts in the model. Top and bottom covers, two logos on both sides and a central body, with two slots for logos and a cut-out nickname on both sides.
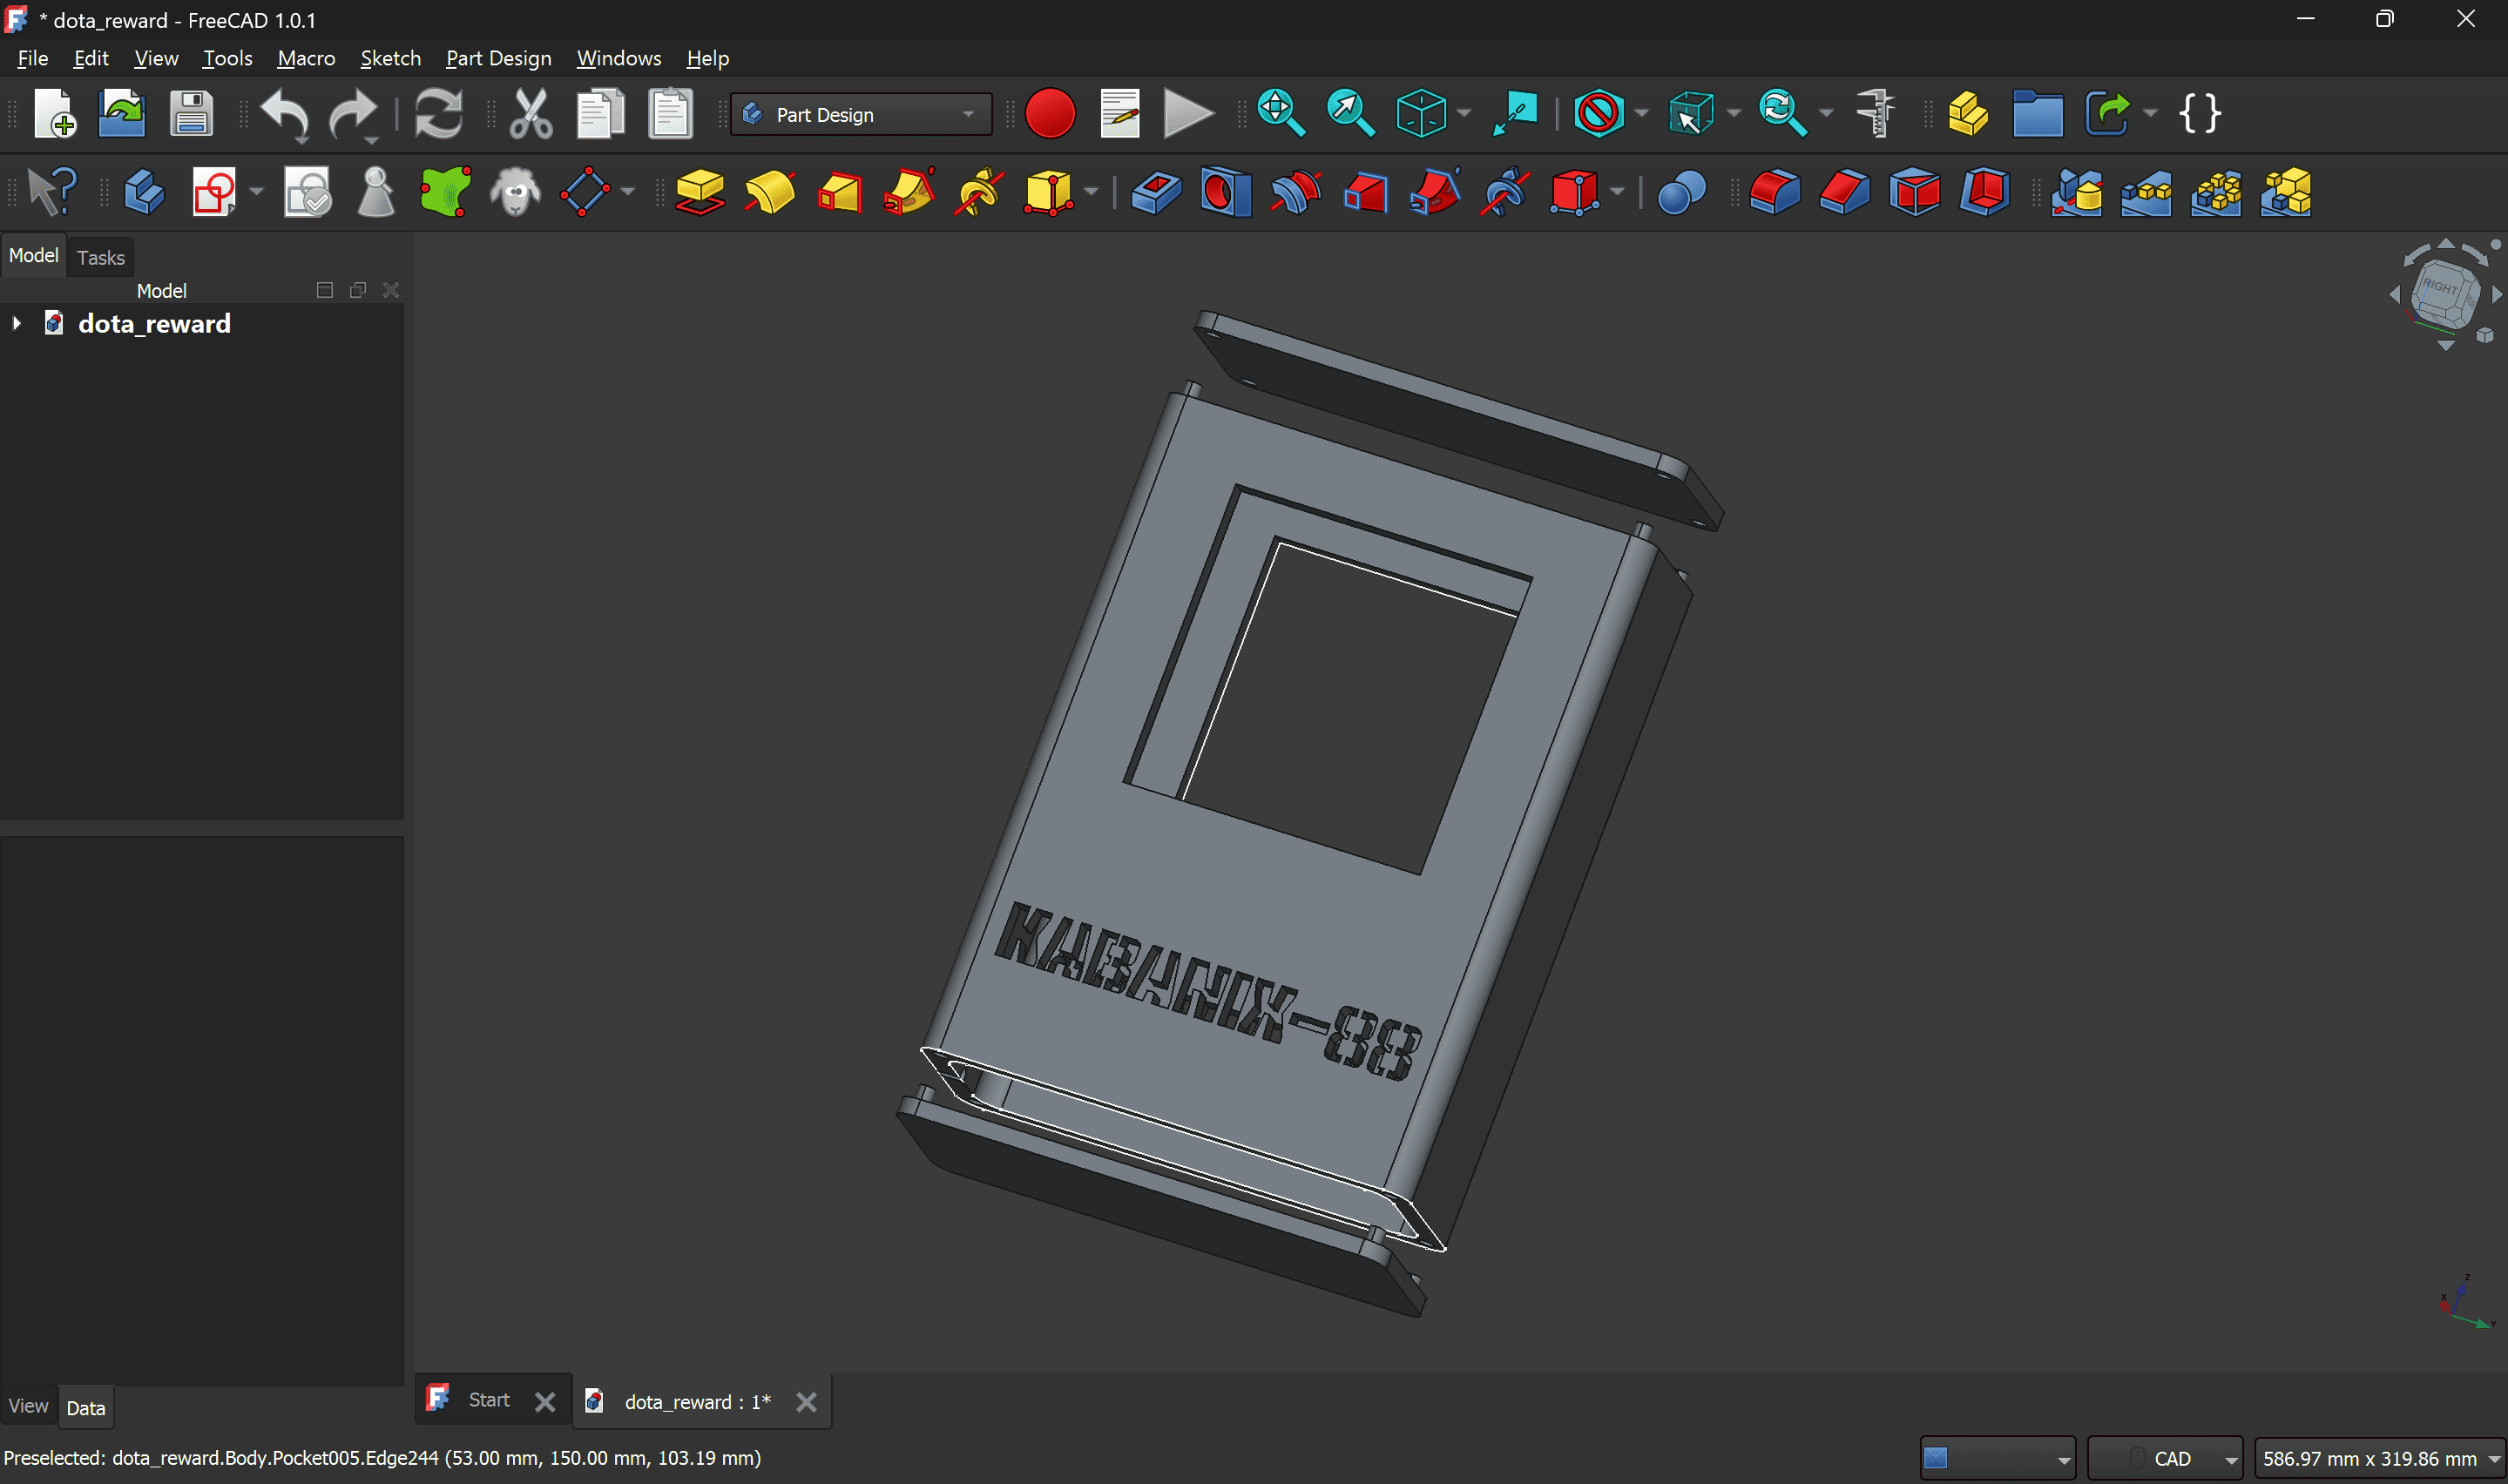
One of the big challenges in creating the Dota 2 reward was connections. I wanted the top and bottom lids to simply connect without glue and extraneous things. But this is not so easy to do. I chose a scheme in which there will be pins at the top of the main part, and holes at the top. But it's hard to guess with the size. In theory, the pin should be 0.2 millimeters smaller in order to fit perfectly and at the same time hold tightly. But the printer does not know how to print with such accuracy, especially in the upper positions, I printed vertically into the main part, but more on that later. As a result, I had to process both the holes and the pins. By the way, I specially made the holes in the top plate through, because it is red, and the pins and the main part are black, which adds aesthetics.
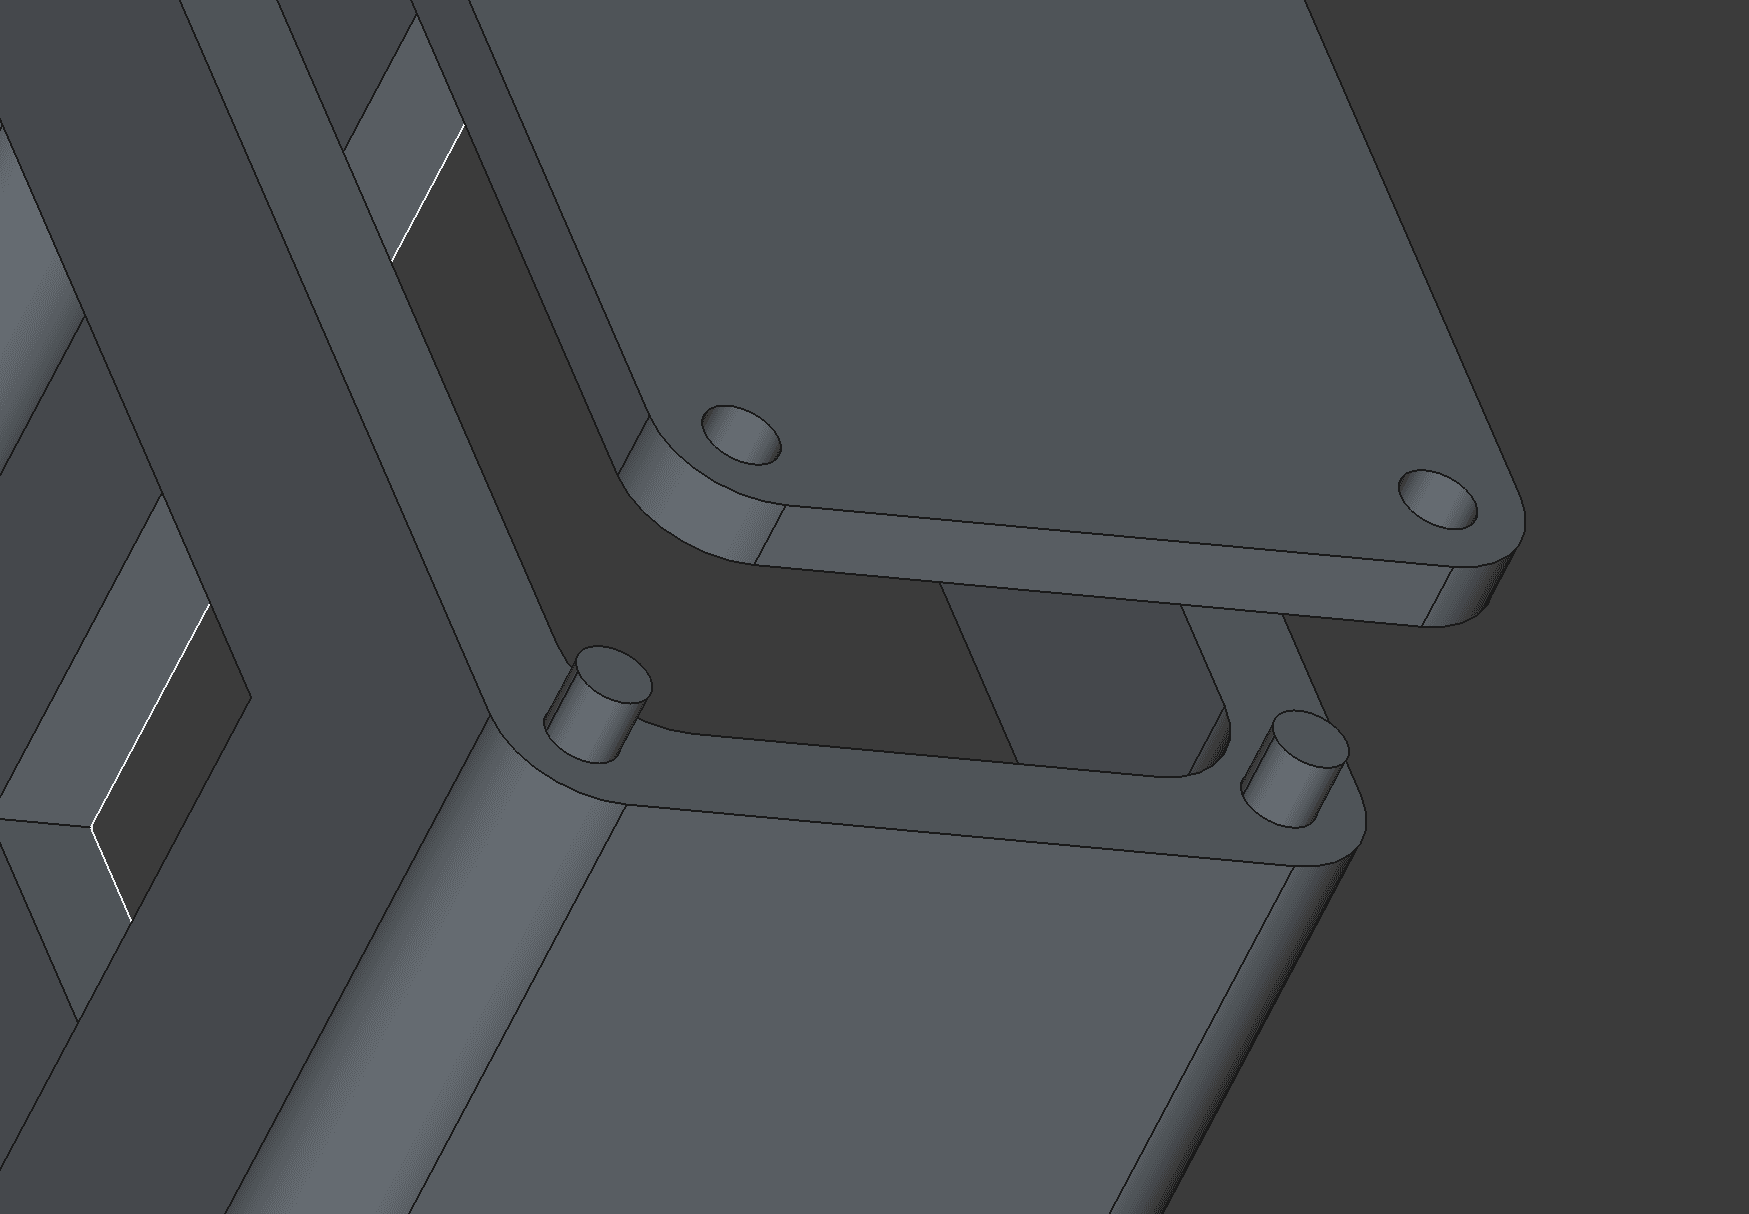
In the lower part, the situation is reversed, the pins are located on the bottom plate and there are holes in the main part. Now I already know that four pins are not enough, and a gap has appeared in the middle between the main part and the plate, due to the flexibility of materials or imperfect printing. In the future, it's worth thinking about additional connection elements.
To set up the Dota 2 reward printing, I used the Creality Print program. Yes, I know that professionals choose other, possibly cooler programs. But the functionality that is here is enough for me. 😎
Probably the biggest difficulty in this print is the height of the model. The higher the printing rate, the greater the risk that the model will be uneven. Small errors result in significant curvature after thousands of layers.
Another problem is support. The location of the central one, which holds the arch of two slots for the logo, suited me. But the letter codes raised a lot of questions, especially how to delete it all later and whether there would be a lot of mistakes.
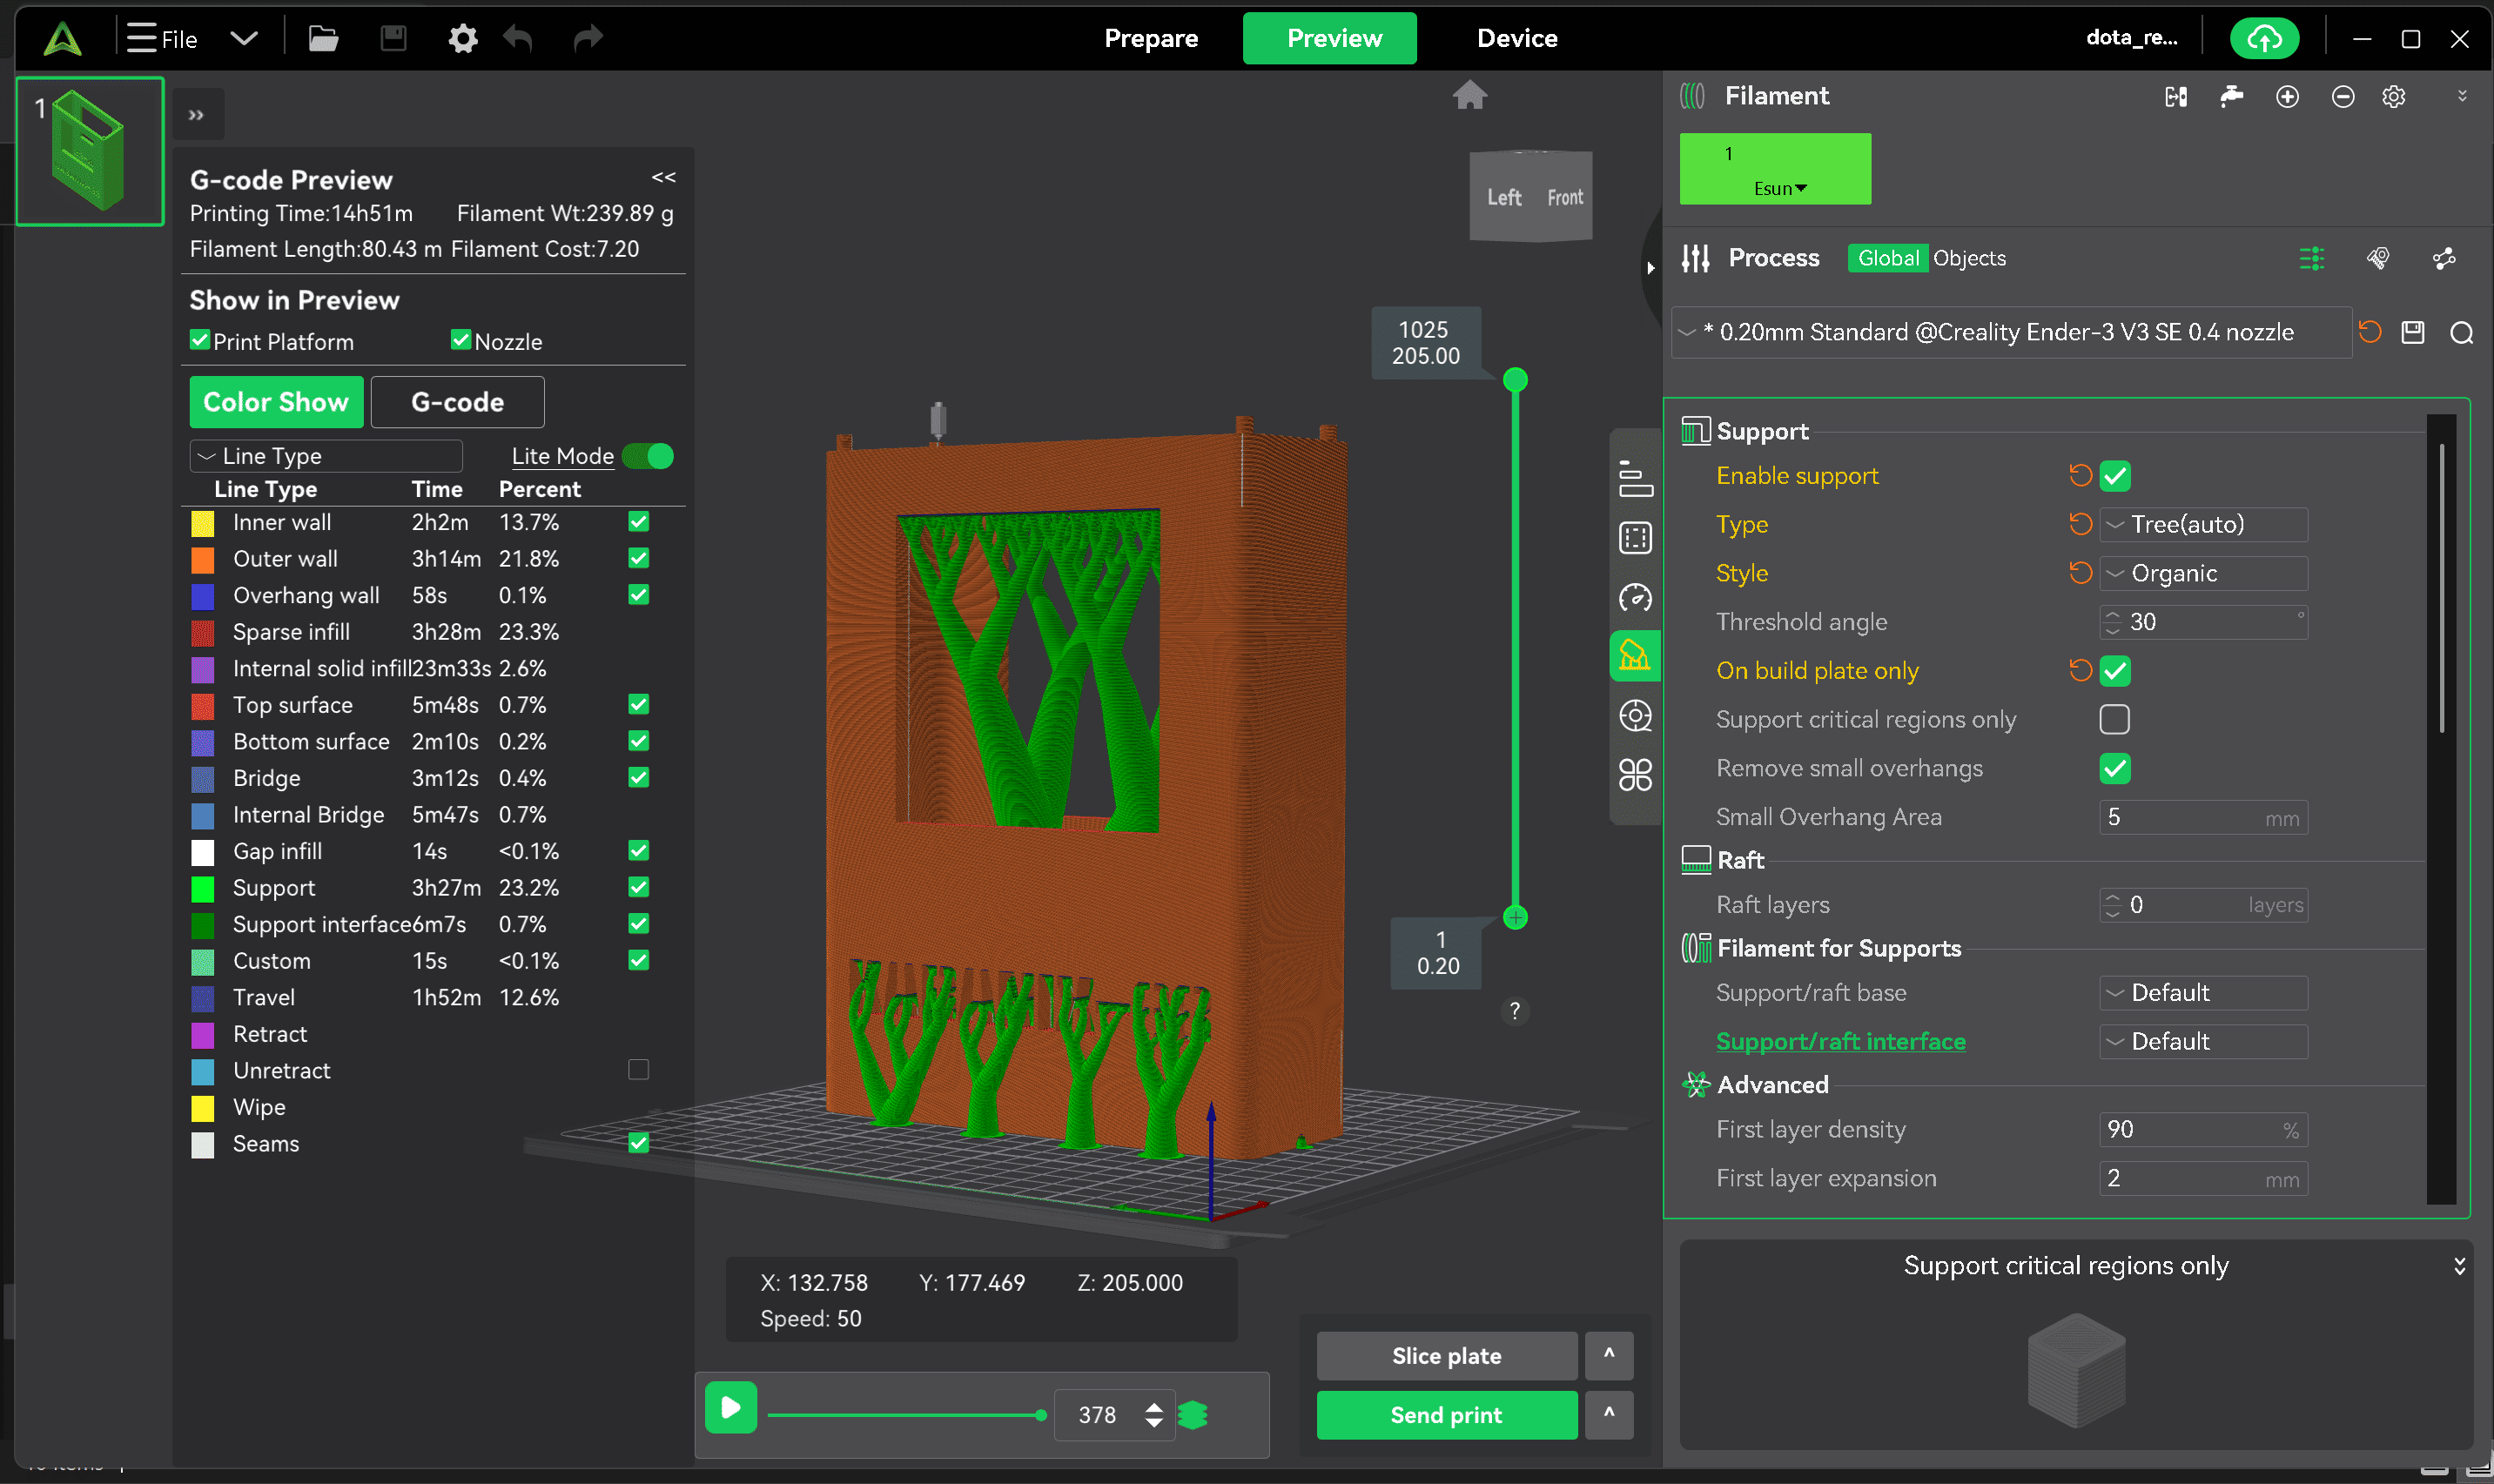
I think one of the important things when printing is the temperature, which is different for each type of plastic. This must be taken into account and specified in the settings.
Despite my concerns, it turned out to print a high-quality model the first time, spending only 240 grams of plastic. But then there was a long manual job of removing all these supports with a knife.
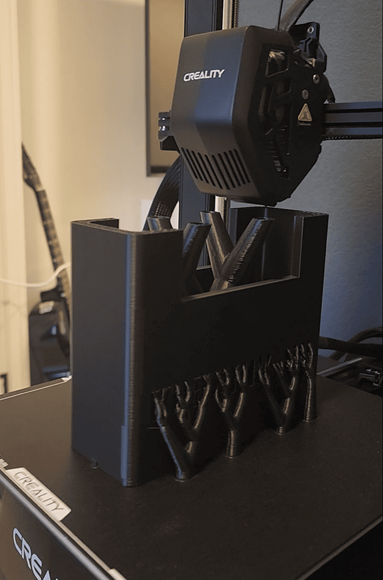
If desired, you can certainly find fault with some errors and problems. But considering that this was the first project that I completely modeled, printed and assembled myself. I think I was very satisfied. By the way, in the process of cleaning the letters from the supports, there was a problem that when printing, a lot of small plastic cobwebs formed there. 🤔At first I tried to remove them manually, but they were too elastic and it was difficult.
After a while, I just took a lighter and burned it all from the inside. It's nice that nothing went wrong. The lighter smokes heavily, this should be taken into account especially if light-colored plastic is used.
It was easier to get a reward with the Dota 2 logo. I took the image in the format.png squeezed it into a three-dimensional shape and added a square for the size of the hole in the main model. 👍
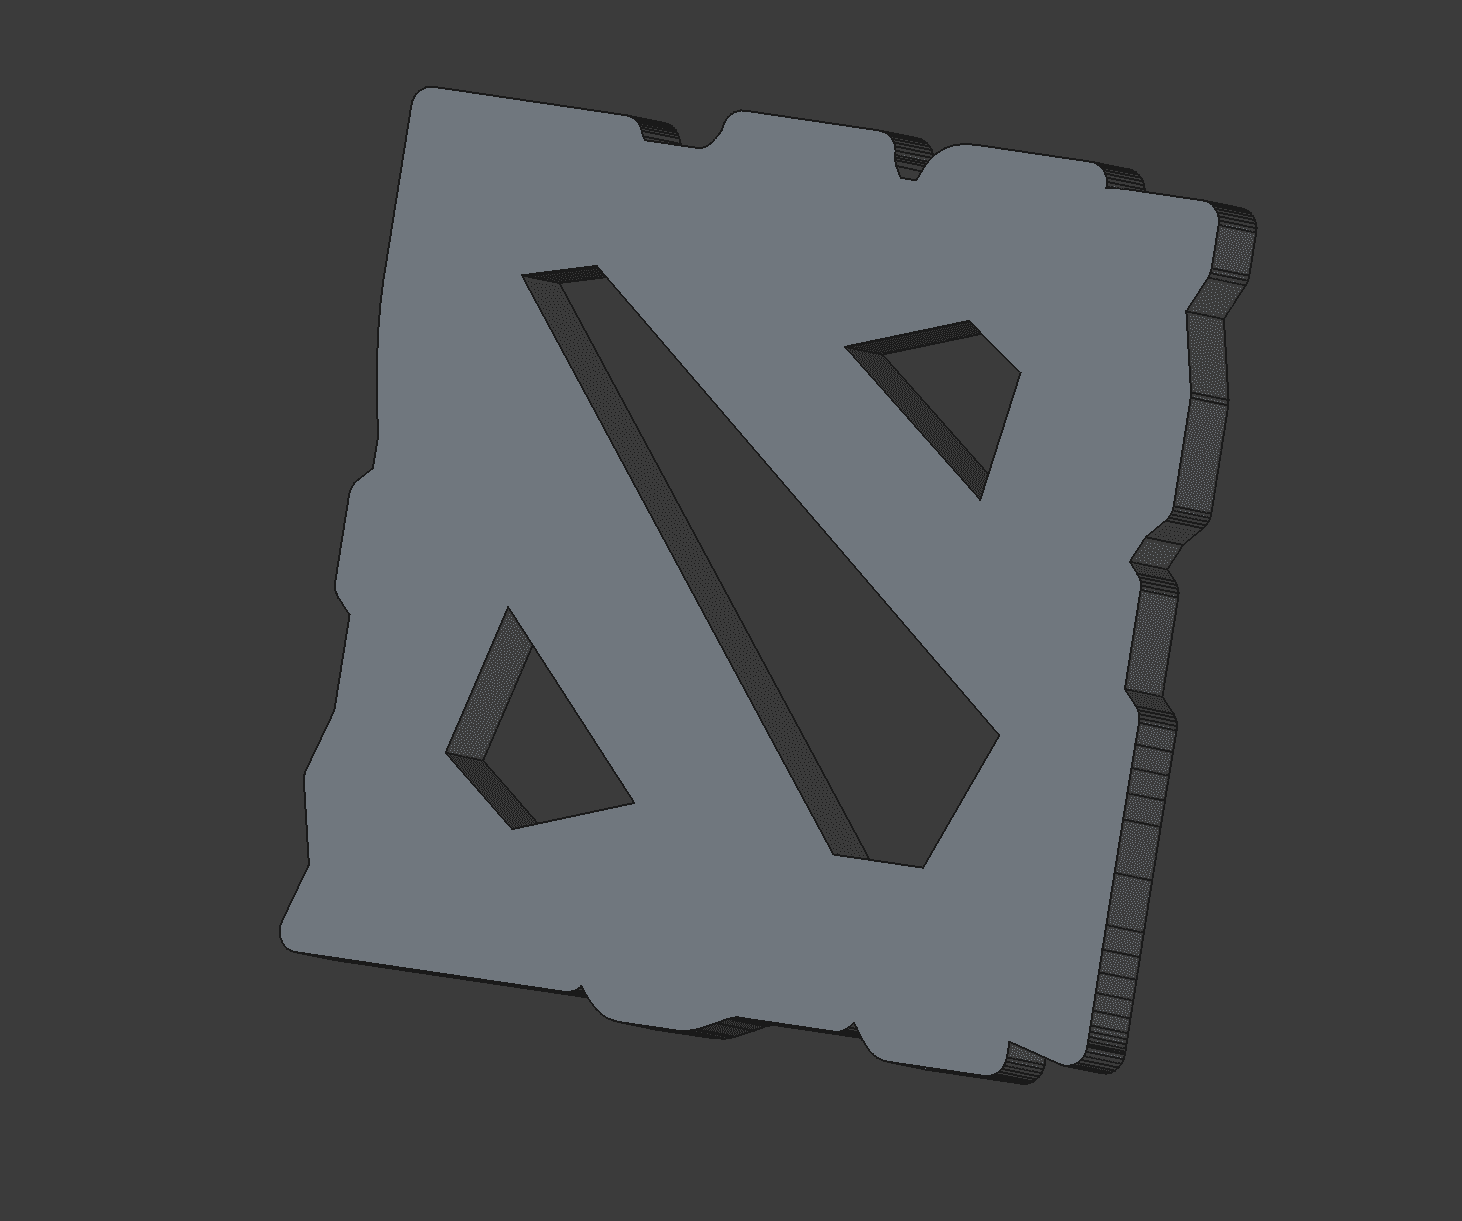
The only nuance here is the depth of the square that fits into the hole of the main model. If it is longer than the wall thickness of the main figure, it may prevent the illumination inside from spreading normally.
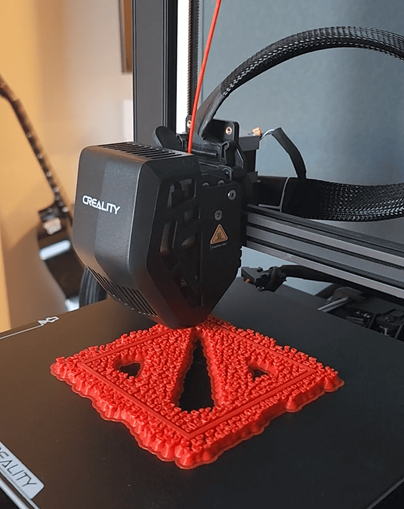
There were some problems with printing the Dota 2 logo. More precisely, I created these problems myself. 😂 It was logical to print the model as shown in the picture below. But in this case, I would get 3D printing strips, since the first layers do not fit as well as the rest.

Therefore, I decided to print the other way around with supports, especially since the printer has the function of smoothing the top layer. But in the end it was a bad idea, and the smoothing turned out to be crooked due to incorrect settings and, most importantly, such small supports could not be cleaned well. One detail remained in my memory, and I printed out two more as expected, and they turned out well.
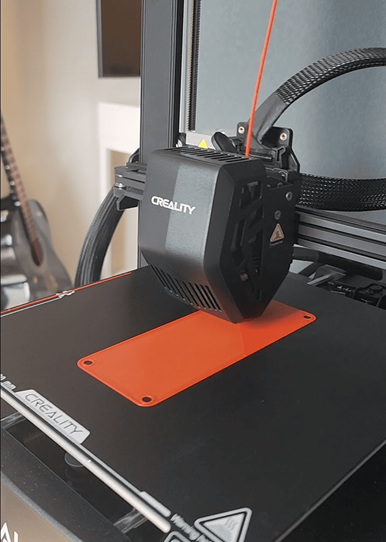
There were no problems with the printing of the upper and lower plates, so there's not much to tell. 🤔
And now the most interesting moment of the project has come, all the details have been prepared, it remains only to assemble and enjoy the result. 😎 Since this Dota 2 award is also a lamp, I picked up a special COB LED strip. It differs from the usual ones by a special coating, thanks to which it gives even light without dividing into separate LEDs, as in other tapes. And it works from 5V, which allows you to connect to a variety of energy sources from USB in a computer to a paverbank.
The most attentive of you have noticed that there is a semicircular hole on the end of the main part specifically for the LED strip cable, which I will glue and press with the bottom plate. 😉
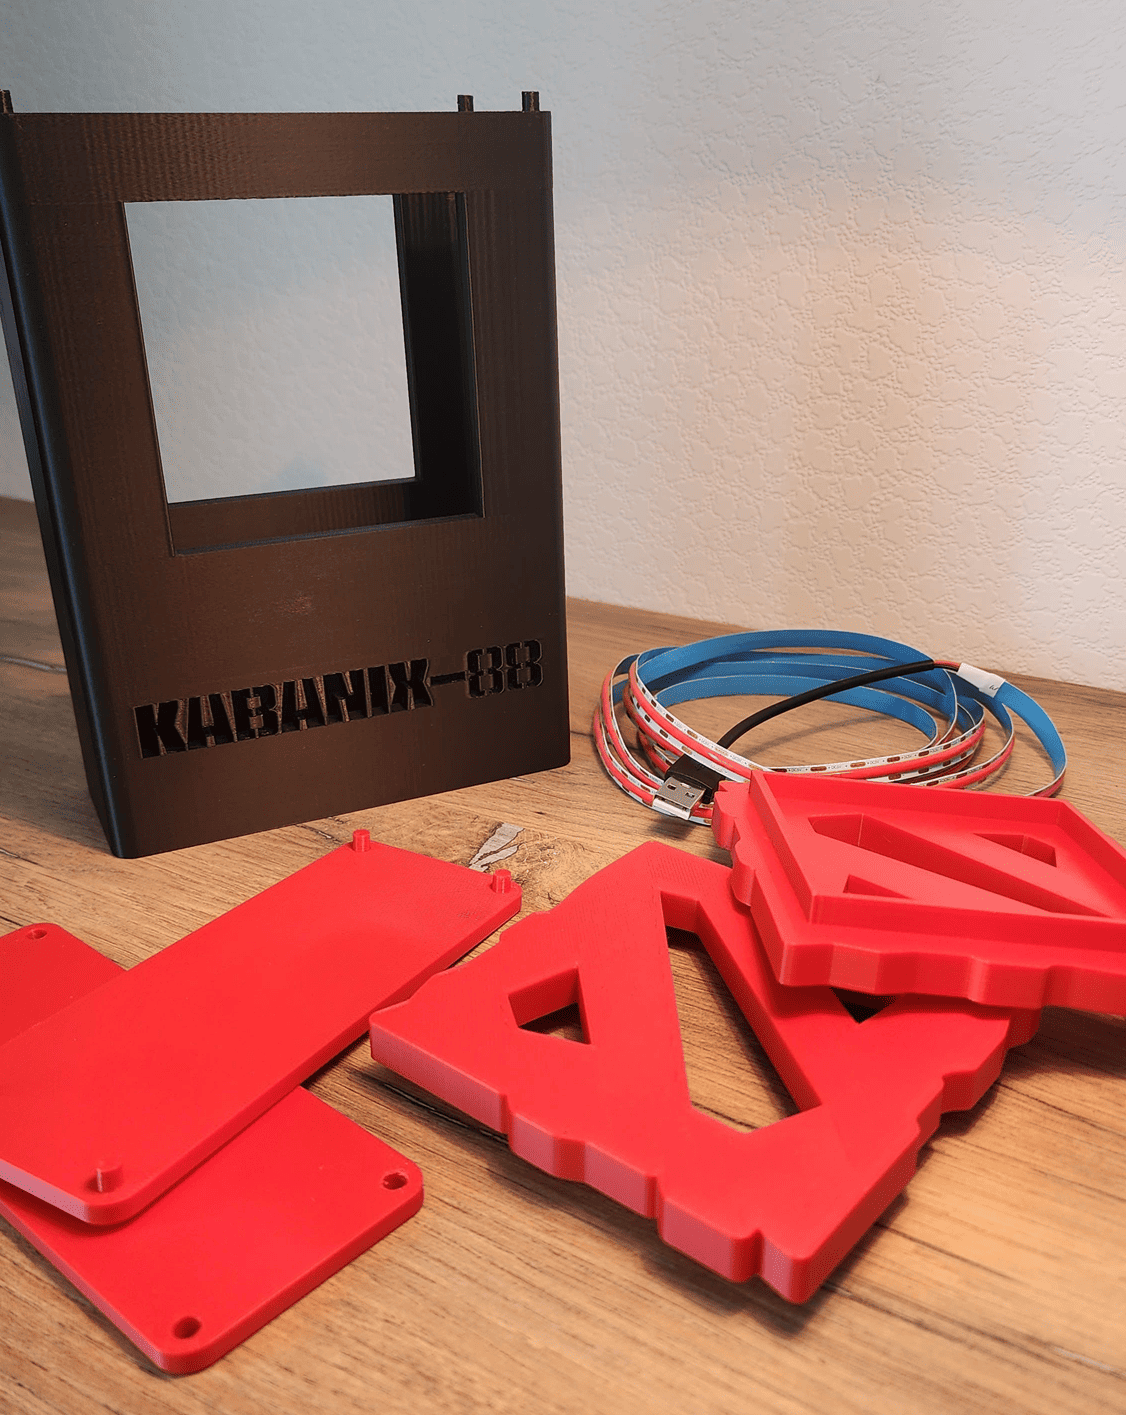
There are no more tricks here, I glue the tape from the inside into two circles, close the plates and insert the logos. That's the beauty of it!
My friend's birthday has already passed, and he was very happy with such a gift. Well, at least he told me he was very happy. 😂
He even managed to perfect all this, as can be seen in the picture, through the inscription and the logo you can see the partitions on the other side. So for the sake of beauty, he laid a piece of plastic in the middle of this Dota 2 award lamp. I don't argue, maybe it's even better this way.
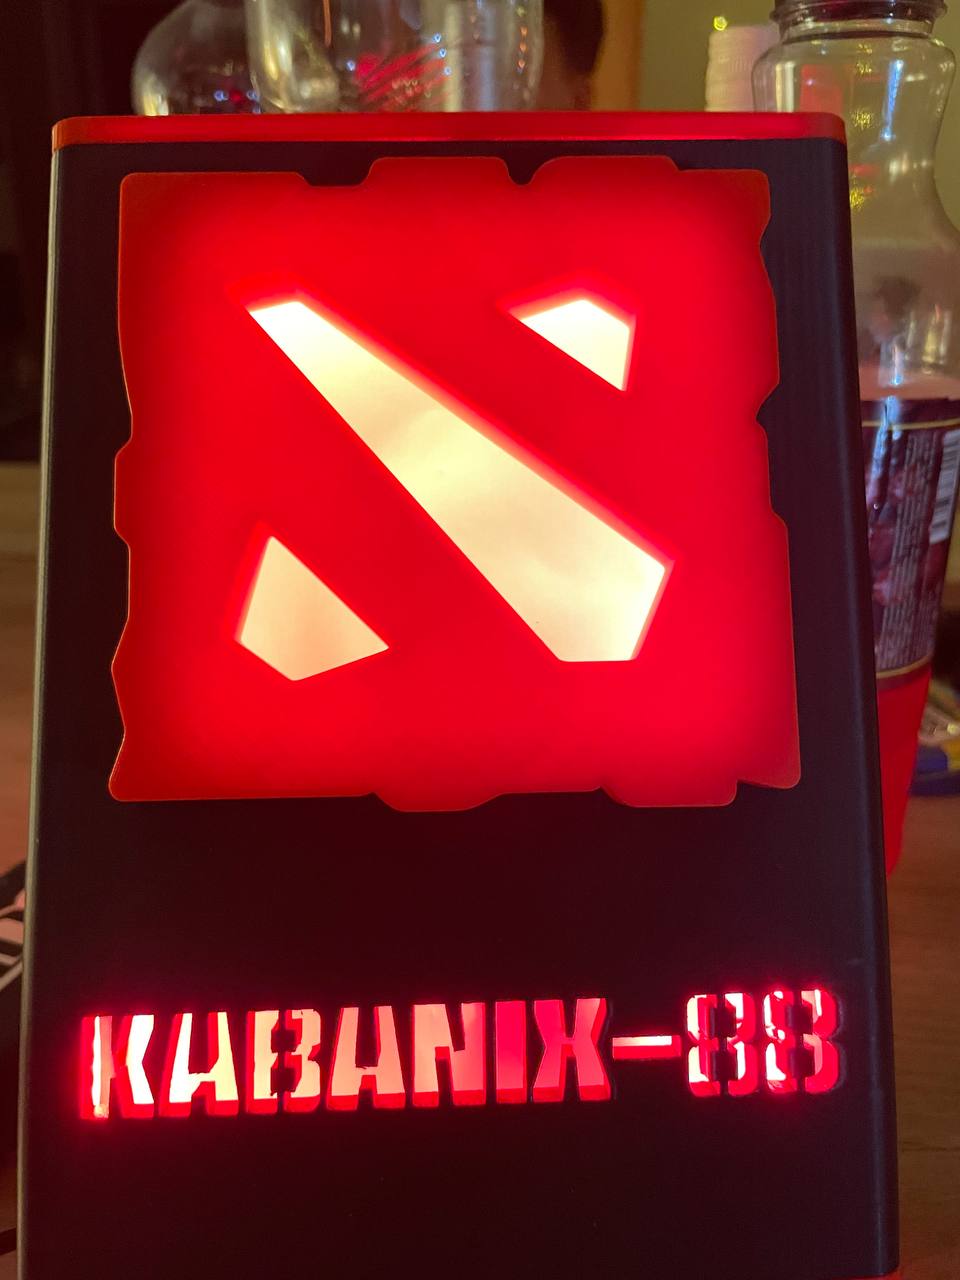
Although my option is not bad either! 😁