Keycloak installing, setting up with Nginx and troubleshooting

And hello again! This week I was really surprised when my boss gave me a new task. Installing and setting up a new service with the name Kaycloak. Of course early I never heard about this system and new experience was interesting. Few words about Keycloak.
Keycloak is an open-source identity and access management (IAM) solution designed to secure modern applications and services. It provides centralized authentication and authorization, allowing developers to easily integrate secure login mechanisms without having to build them from scratch. Keycloak supports industry-standard protocols like OAuth 2.0, OpenID Connect, and SAML, enabling features such as single sign-on (SSO), social logins (e.g., Google, Facebook), and LDAP/Active Directory integration.
One of the main advantages of Keycloak is its ability to simplify user management—administrators can handle user registration, password policies, and role-based access control (RBAC) in one place. Additionally, it enhances security with features like multi-factor authentication (MFA), brute-force protection, and token-based security.
Keycloak is widely used in microservices architectures, cloud-native applications, and enterprise systems to offload identity management complexities, improve security, and ensure compliance with authentication standards. By delegating authentication to Keycloak, developers can focus on core application logic while maintaining robust security.
This is what the architecture of our system looks like where we use Keycloak. We have a biometric payment system, which consists of two Java apps:
- gateway
- management
First app needs to process biometric payments, second app needs to configure the first app and there we have a frontend. So, Keycloak helped us to solve a security moment when a user logs in to the management app through the frontend.
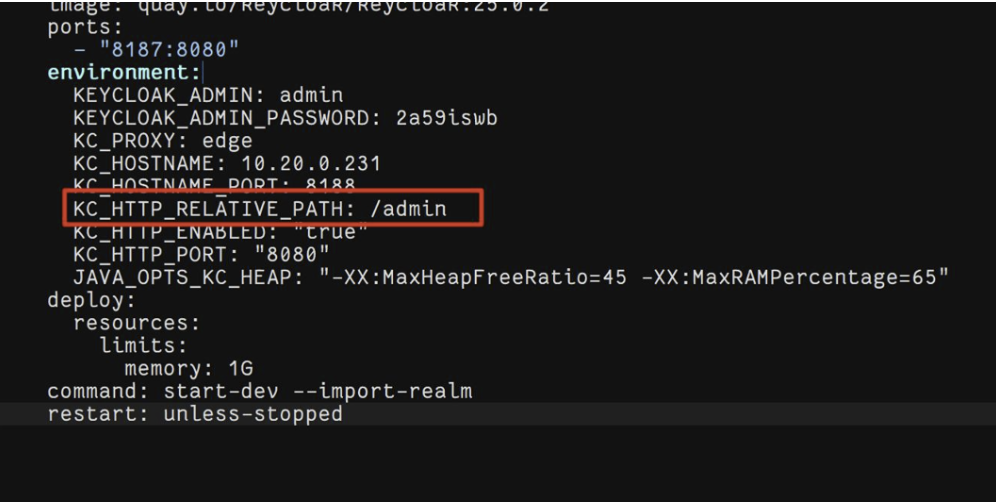
Installing Keycloak with docker-compose.yml
version: '3.8'

services:
  keycloak:
    image: quay.io/keycloak/keycloak:25.0.2
    ports:
      - "***:8080"
    environment:
      KEYCLOAK_ADMIN: *****
      KEYCLOAK_ADMIN_PASSWORD: ******
      KC_PROXY: edge
      KC_HOSTNAME: something.com
      KC_HOSTNAME_PORT: 443
      KC_HTTP_ENABLED: "true"
      JAVA_OPTS_KC_HEAP: "-XX:MaxHeapFreeRatio=45 -XX:MaxRAMPercentage=65"
    deploy:
      resources:
        limits:
          memory: 1G
    command: start-dev --import-realm
    restart: unless-stopped
This file and command sudo docker compose -p keycloak up -d
That's all you need to succeed 😎 or not? Of course we have to consider the basic parameters:
  KEYCLOAK_ADMIN: ***** // login for web interface
  KEYCLOAK_ADMIN_PASSWORD: ****** // password for web interfase
  KC_HOSTNAME: something.com // URL redirection
  KC_HOSTNAME_PORT: **** // port
  KC_HTTP_ENABLED: "true" // use hppt or onlu https
The most important thing here is the HOST, PORT and HTTP_ENABLED. I've tried different options, but it only works with https from all sides. How Keycloak is configured on our server. The frontend, which has Let's Encript certificates, redirects to the Keycloak URL, which also has Let's Encript certificates. It didn't work without it, http is not suitable, even though there is a setting. So turn KC_HTTP_ENABLED: "false" off. Remove KC_HOSTNAME_PORT setting, because default is 443. Next we need to set up KC_HOSTNAME URL. For example, if domain your site is something.com, and your site is redirecting request in Keycloak, you need an answer with url something.com; otherwise, you will have a problem with Nginx and Cross-Origin error.
So I think, you think right 😉 here we use internal variables, and if Docker container with Keycloak doesn't work, we need recreate it again with changings inside docker-compose.yml.
And never use this variable, it adjusts the root path. If you specify it incorrectly, all the endpoints will break and Keycloak will not work.
The Kycloak settings also have variables that allow you to connect certificates directly. If you don't want to use Nginx, this can be a great option.
KC_HTTPS_CERTIFICATE_FILE: /path/to/cert.pem
KC_HTTPS_CERTIFICATE_KEY_FILE: /path/to/key.pem
Go to the Nginx settings for working with the web interface and Keycloak requests. This is a working configuration that is installed on our servers and we have no problems with it.
server {
    listen {port} ssl;
    server_name {ip/url};

    ssl_certificate     /etc/nginx/certs/server.crt;
    ssl_certificate_key /etc/nginx/certs/server.key;

    ssl_protocols TLSv1.2 TLSv1.3;
    ssl_prefer_server_ciphers on;


    location / {
        proxy_pass http://10.20.0.231:8187;

        proxy_set_header Host $host;
        proxy_set_header X-Real-IP $remote_addr;
        proxy_set_header X-Forwarded-For $proxy_add_x_forwarded_for;
        proxy_set_header X-Forwarded-Proto $scheme;
        proxy_set_header X-Forwarded-Host $host;
        proxy_set_header X-Forwarded-Port $server_port;

        add_header 'Access-Control-Allow-Origin' '*';
        add_header 'Access-Control-Allow-Methods' 'GET, POST, OPTIONS, PUT, DELETE';
        add_header 'Access-Control-Allow-Headers' 'Content-Type, Authorization, X-Requested-With';
        add_header 'Access-Control-Allow-Credentials' 'true';

        # importaint for Keycloak
        proxy_set_header Origin "";
        proxy_buffer_size          128k;
        proxy_buffers              4 256k;
        proxy_busy_buffers_size    256k;
    }
}
So, here you need to specify just a few of your parameters:
listen - your port
server_name - your server_name
ssl_certificate - path to public key
ssl_certificate_key - path to privat key
In this Nginx config for Keycloak we have many importaint parameters, without which the system will not work. Therefore, it is better to either copy it completely or study each parameter separately.
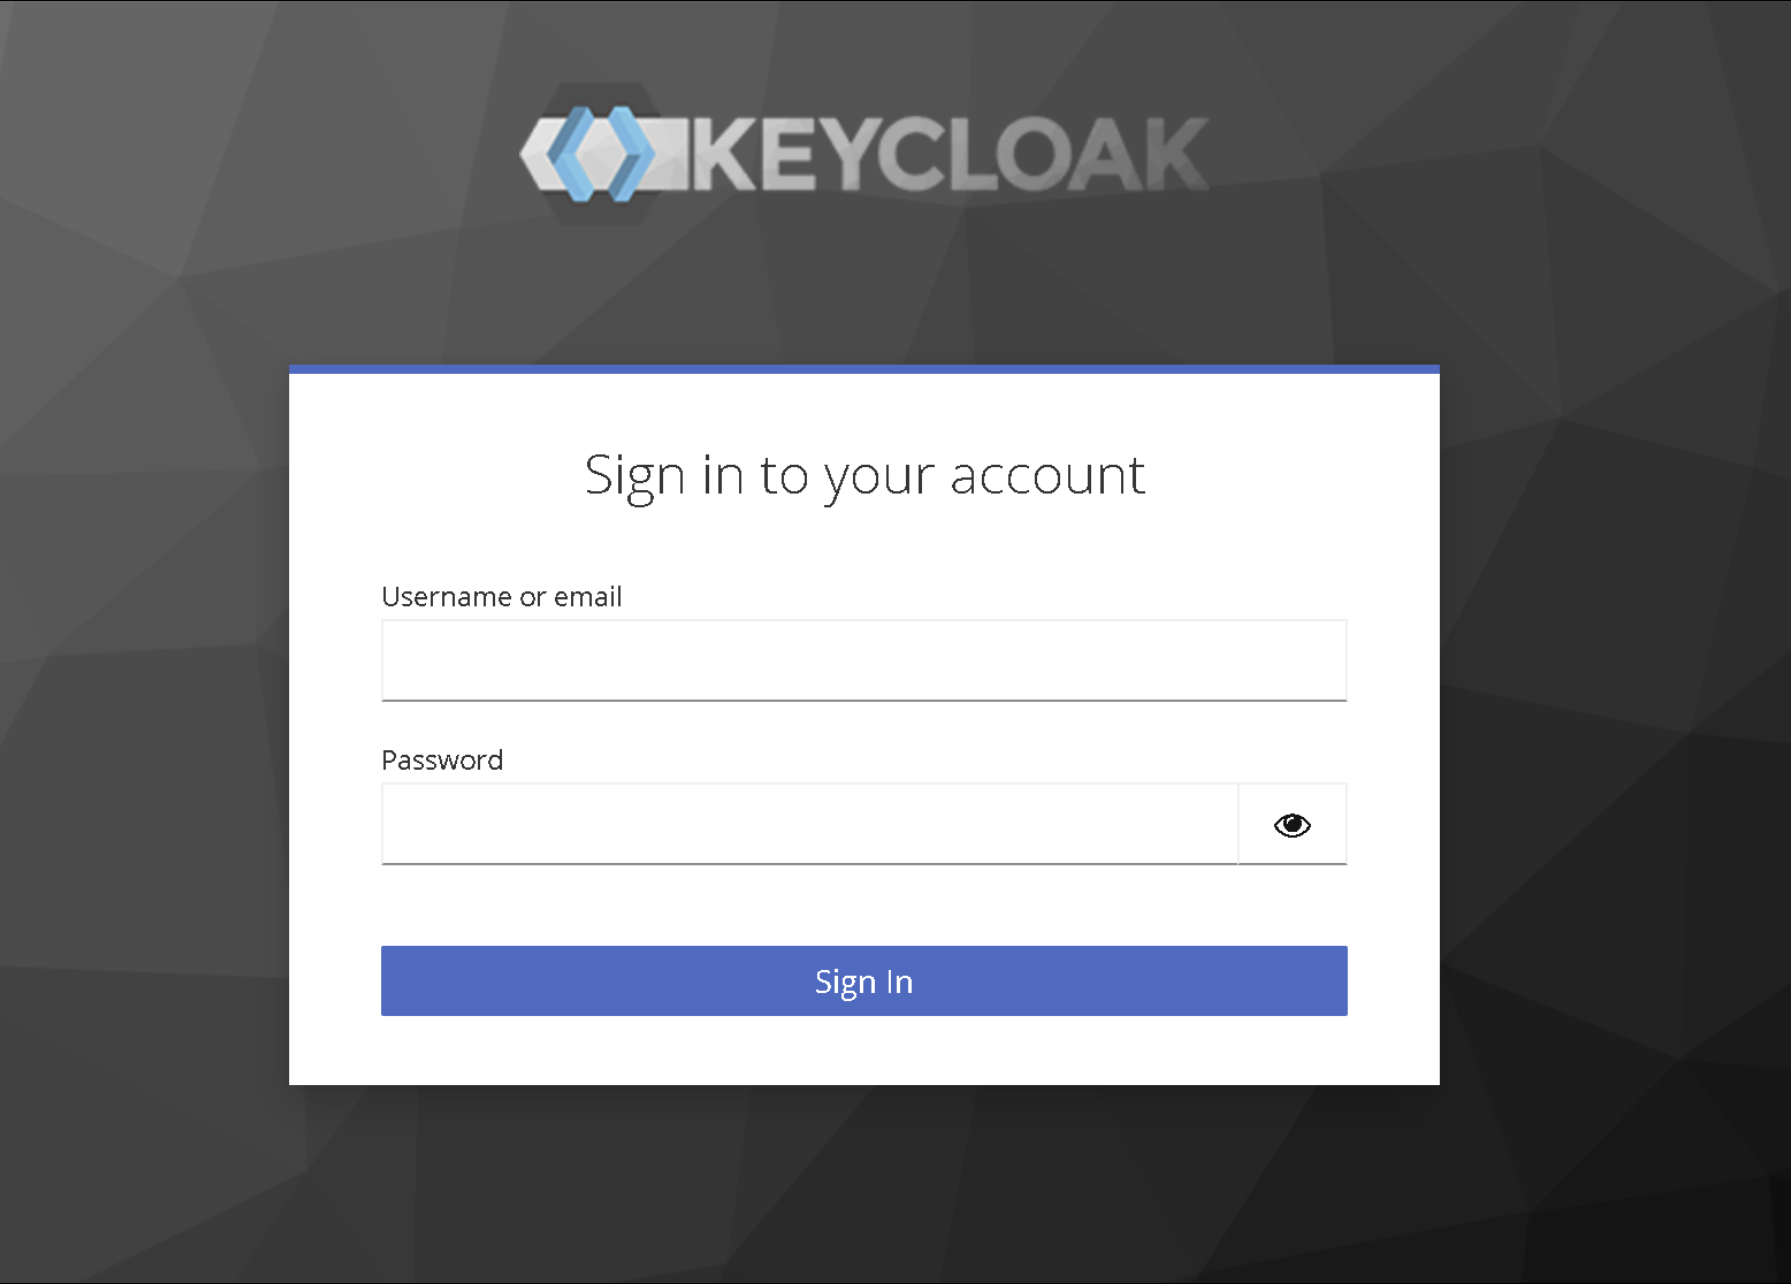
If everything worked out, after launching the Docker container, clicking on the link will take us to the Keycloak web interface. Login and Password we set up early in docker-compose.yml
  KEYCLOAK_ADMIN: *****
  KEYCLOAK_ADMIN_PASSWORD: ******
We enter and get inside the system...
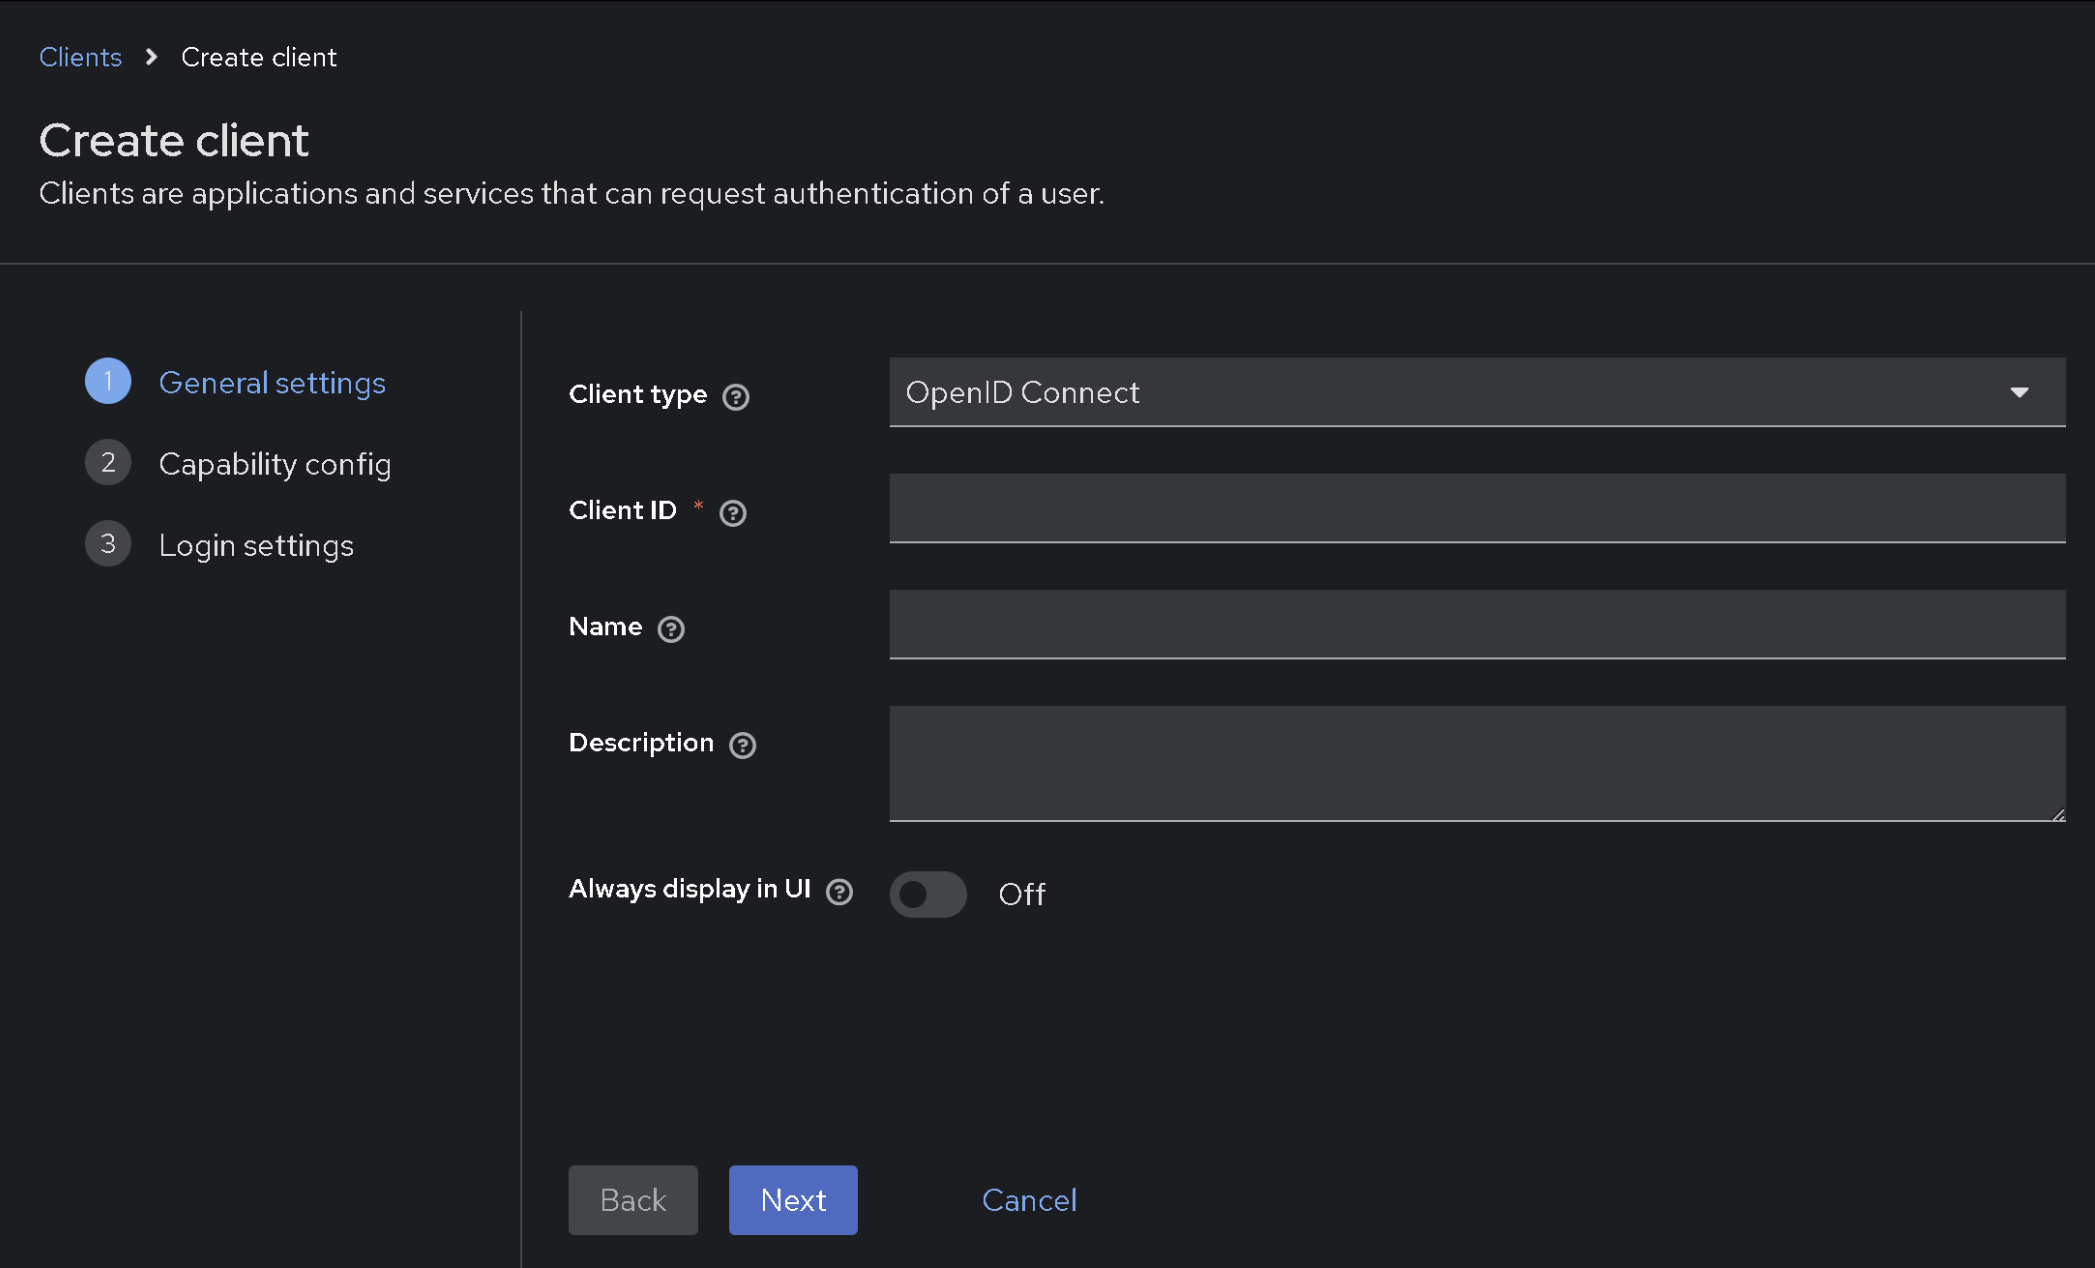
This is an article about installation, so there will be little information about configuring Keycloak itself, but I will specify the minimum necessary for the system to work. In order for Keycloak to accept requests, we need to create a client. Proceed as shown in the screenshot.
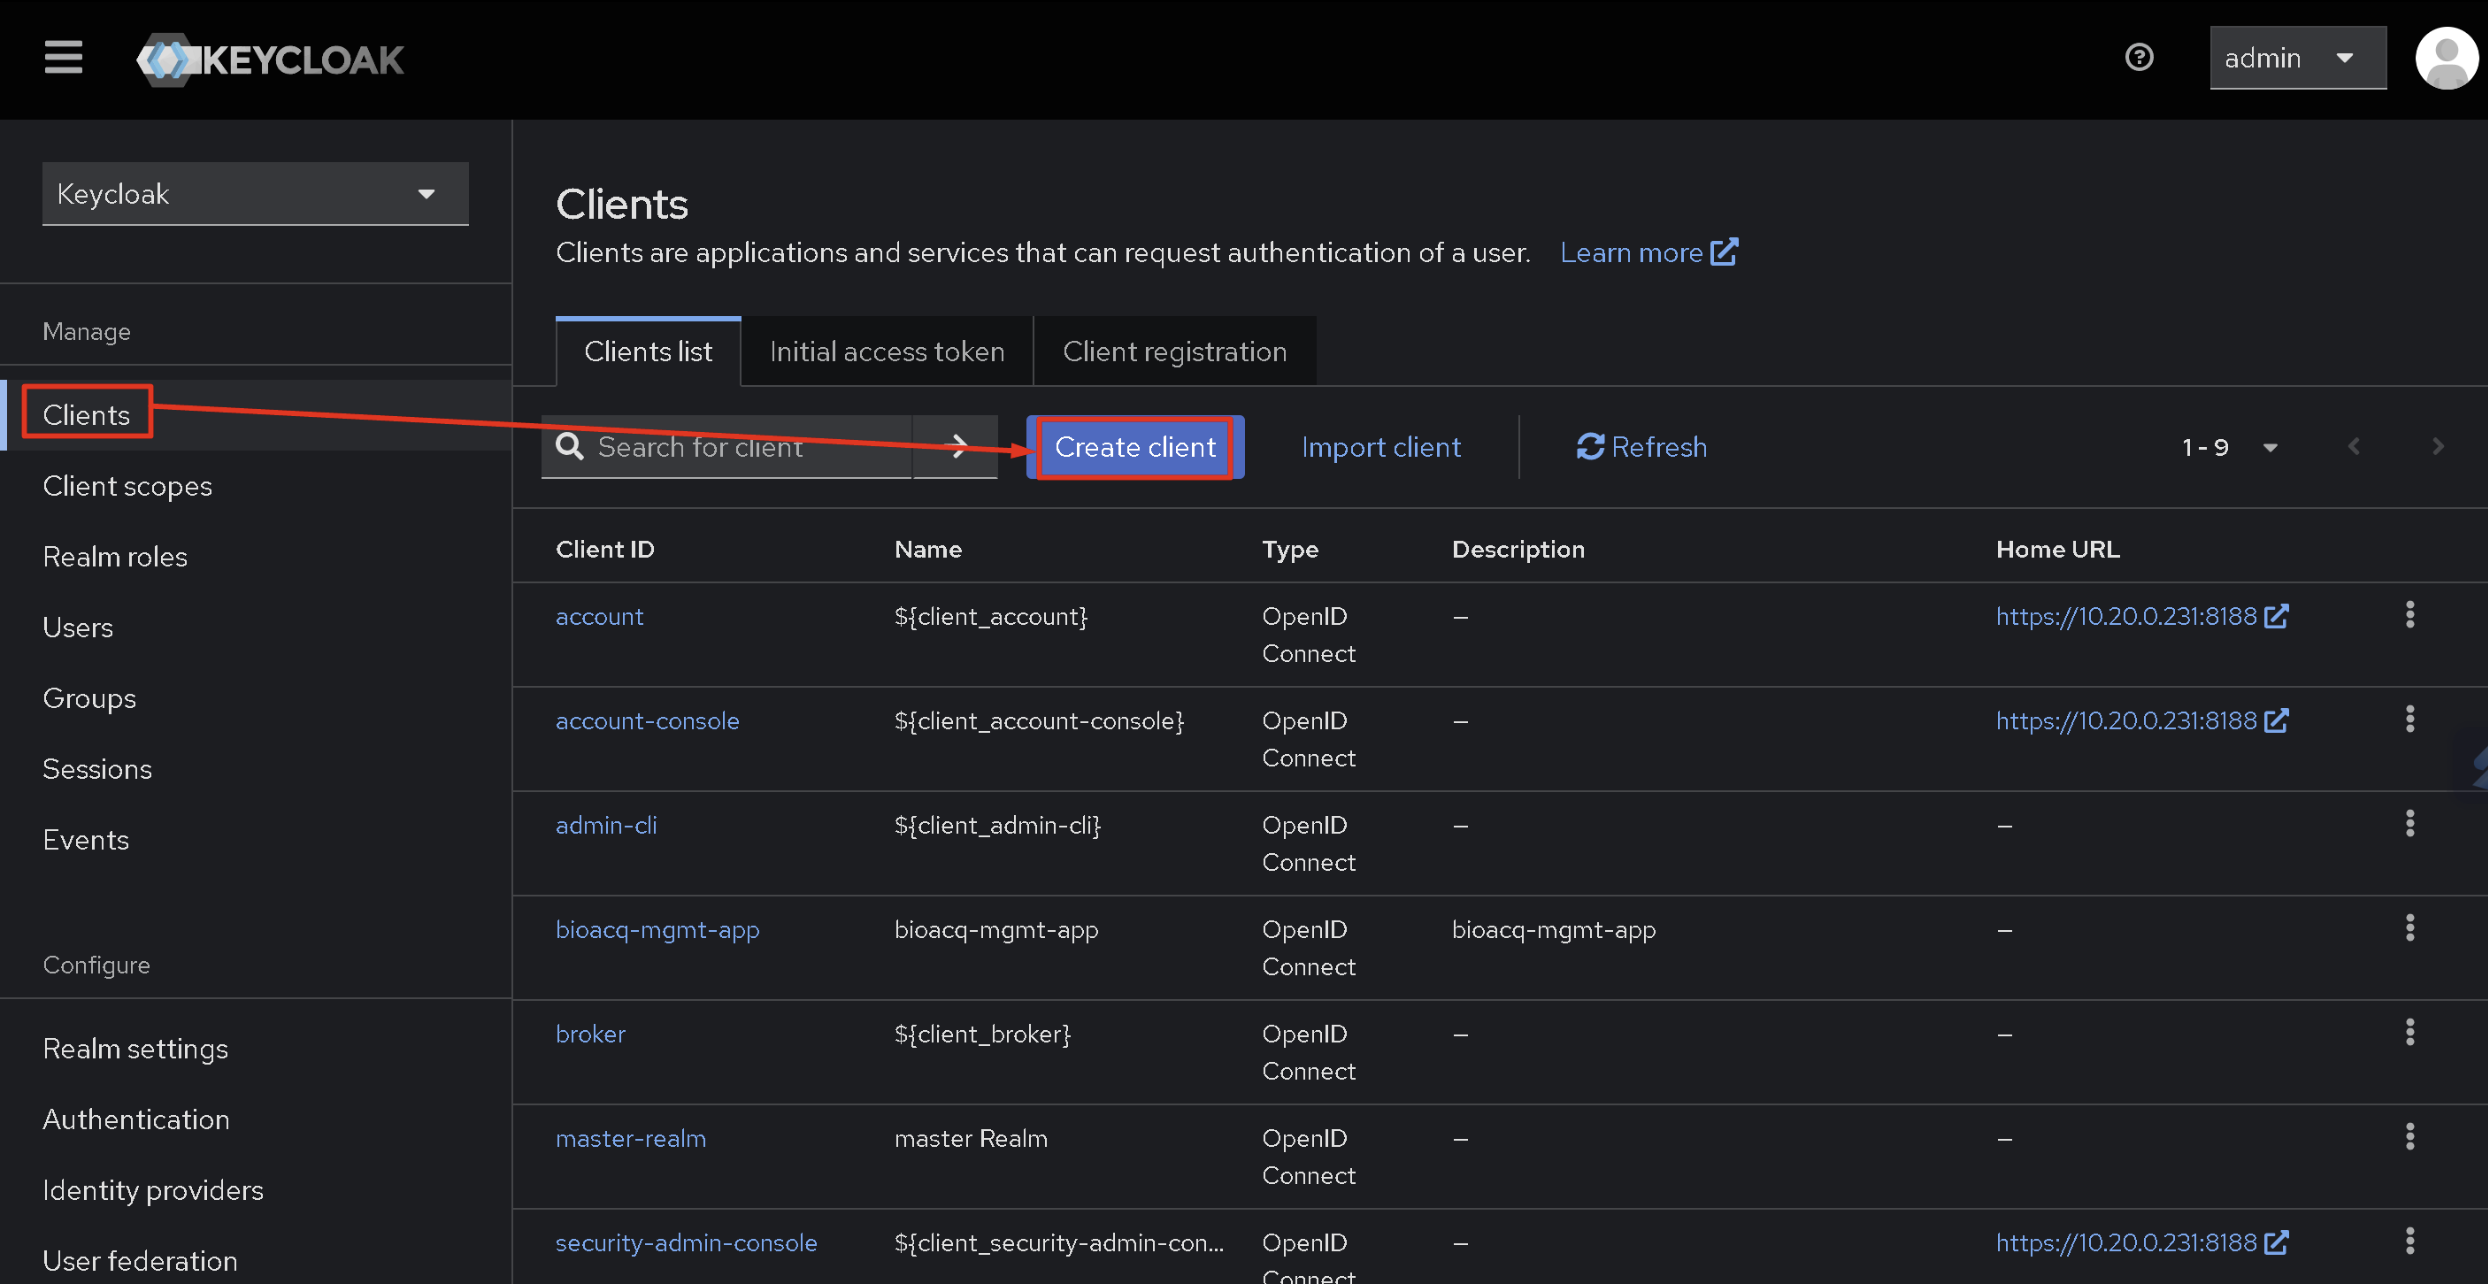
We specify the Client ID, which is a unique identification parameter. Click next...
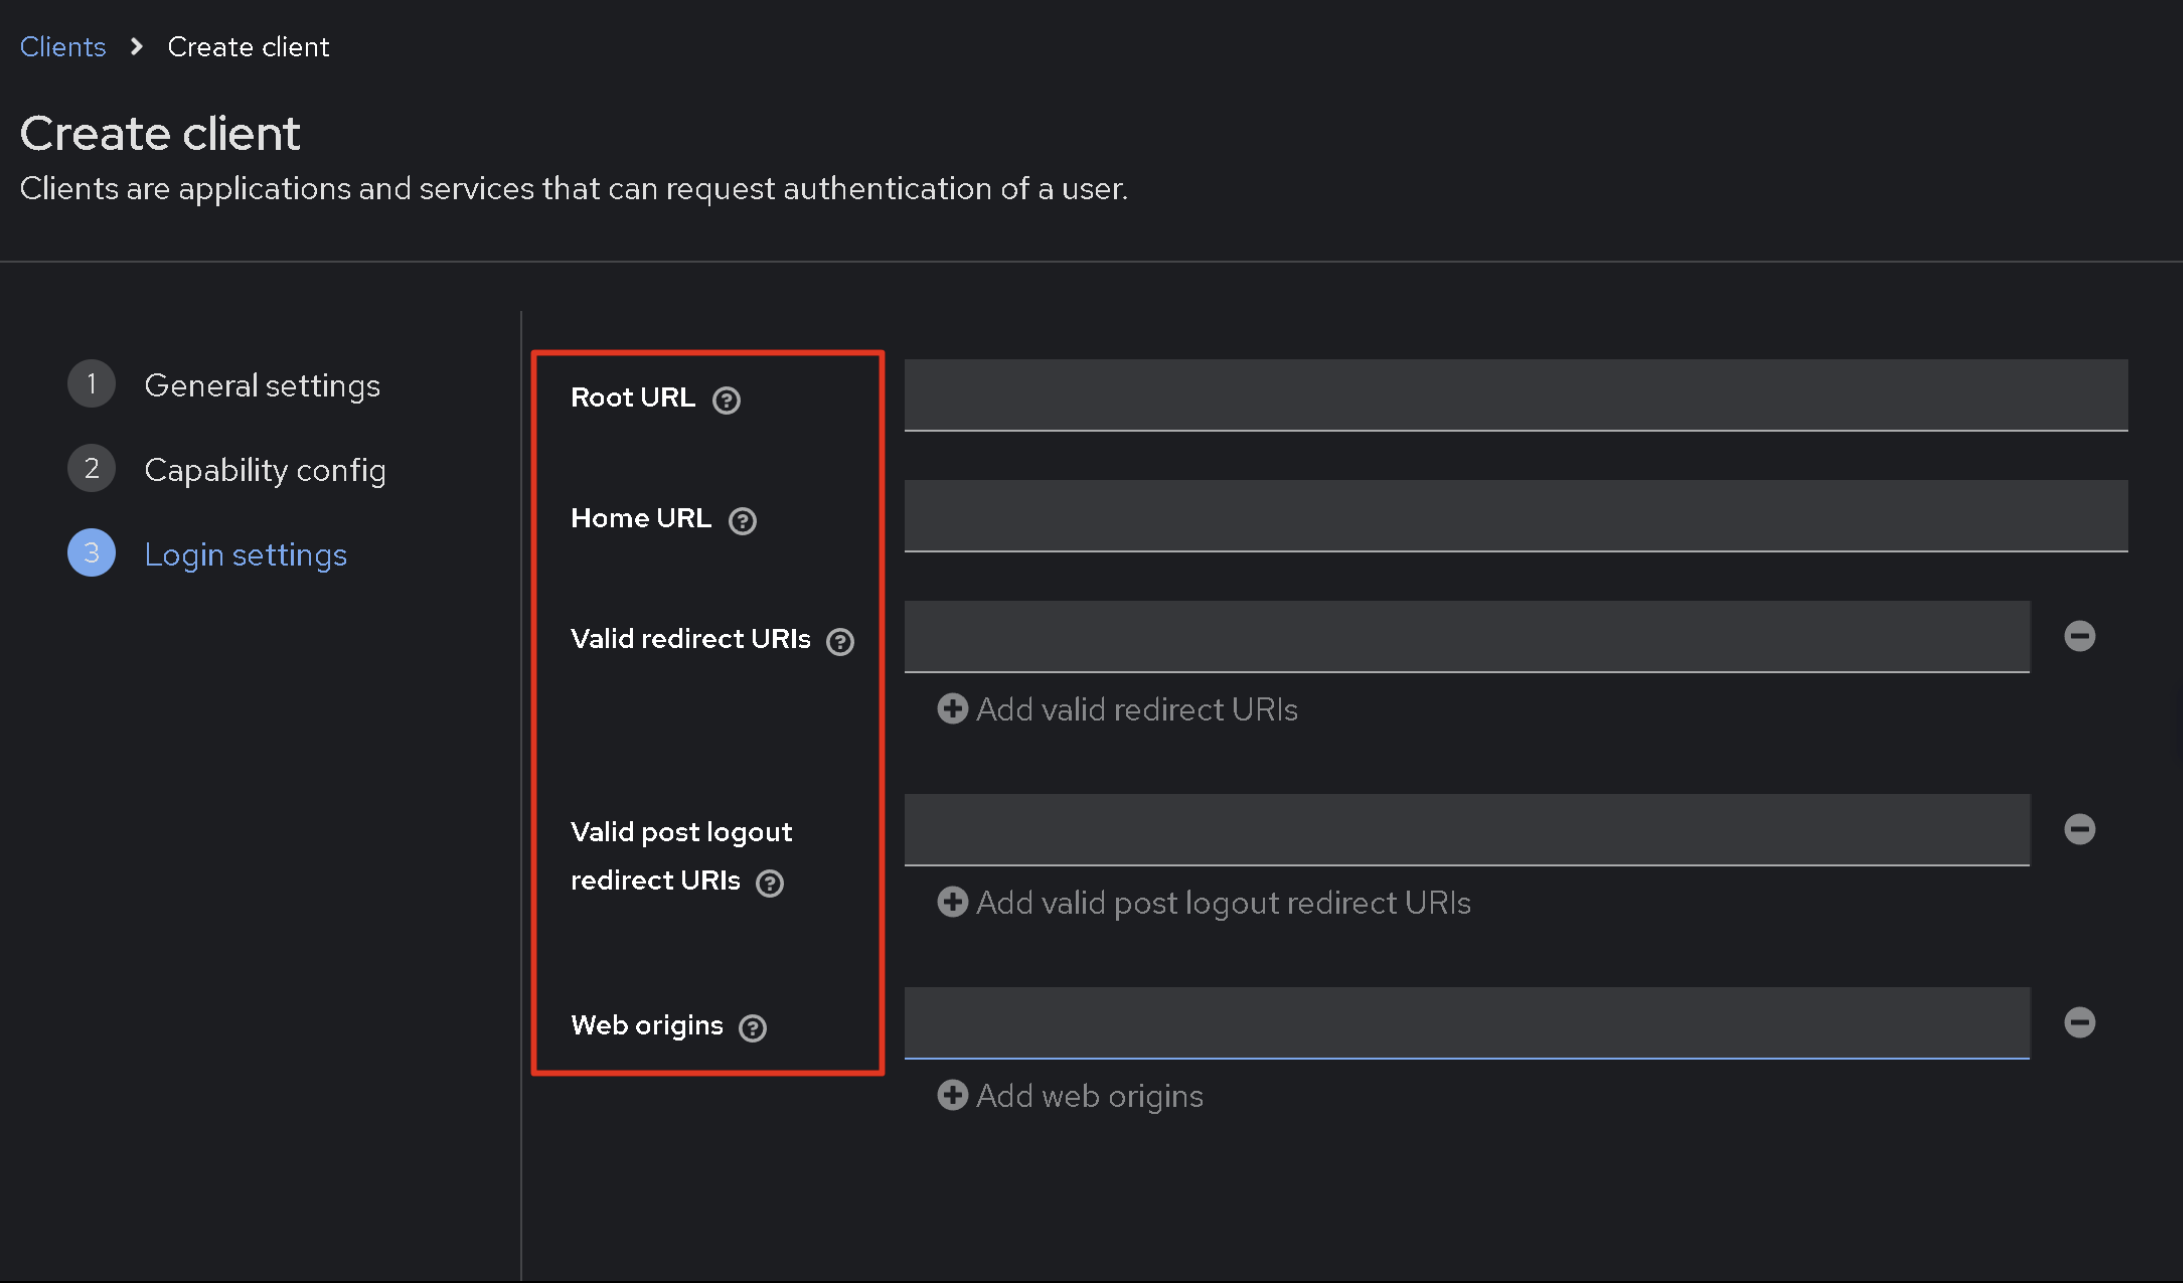
Root URL, Home URL and other these are the addresses from which the authentication request will receive Keycloak. In fact, these are the addresses that the system will work with. Since our system is simple, I specified the format address everywhere https://something.com/ only in the Valid redirect URLs parameter I added * at the end.
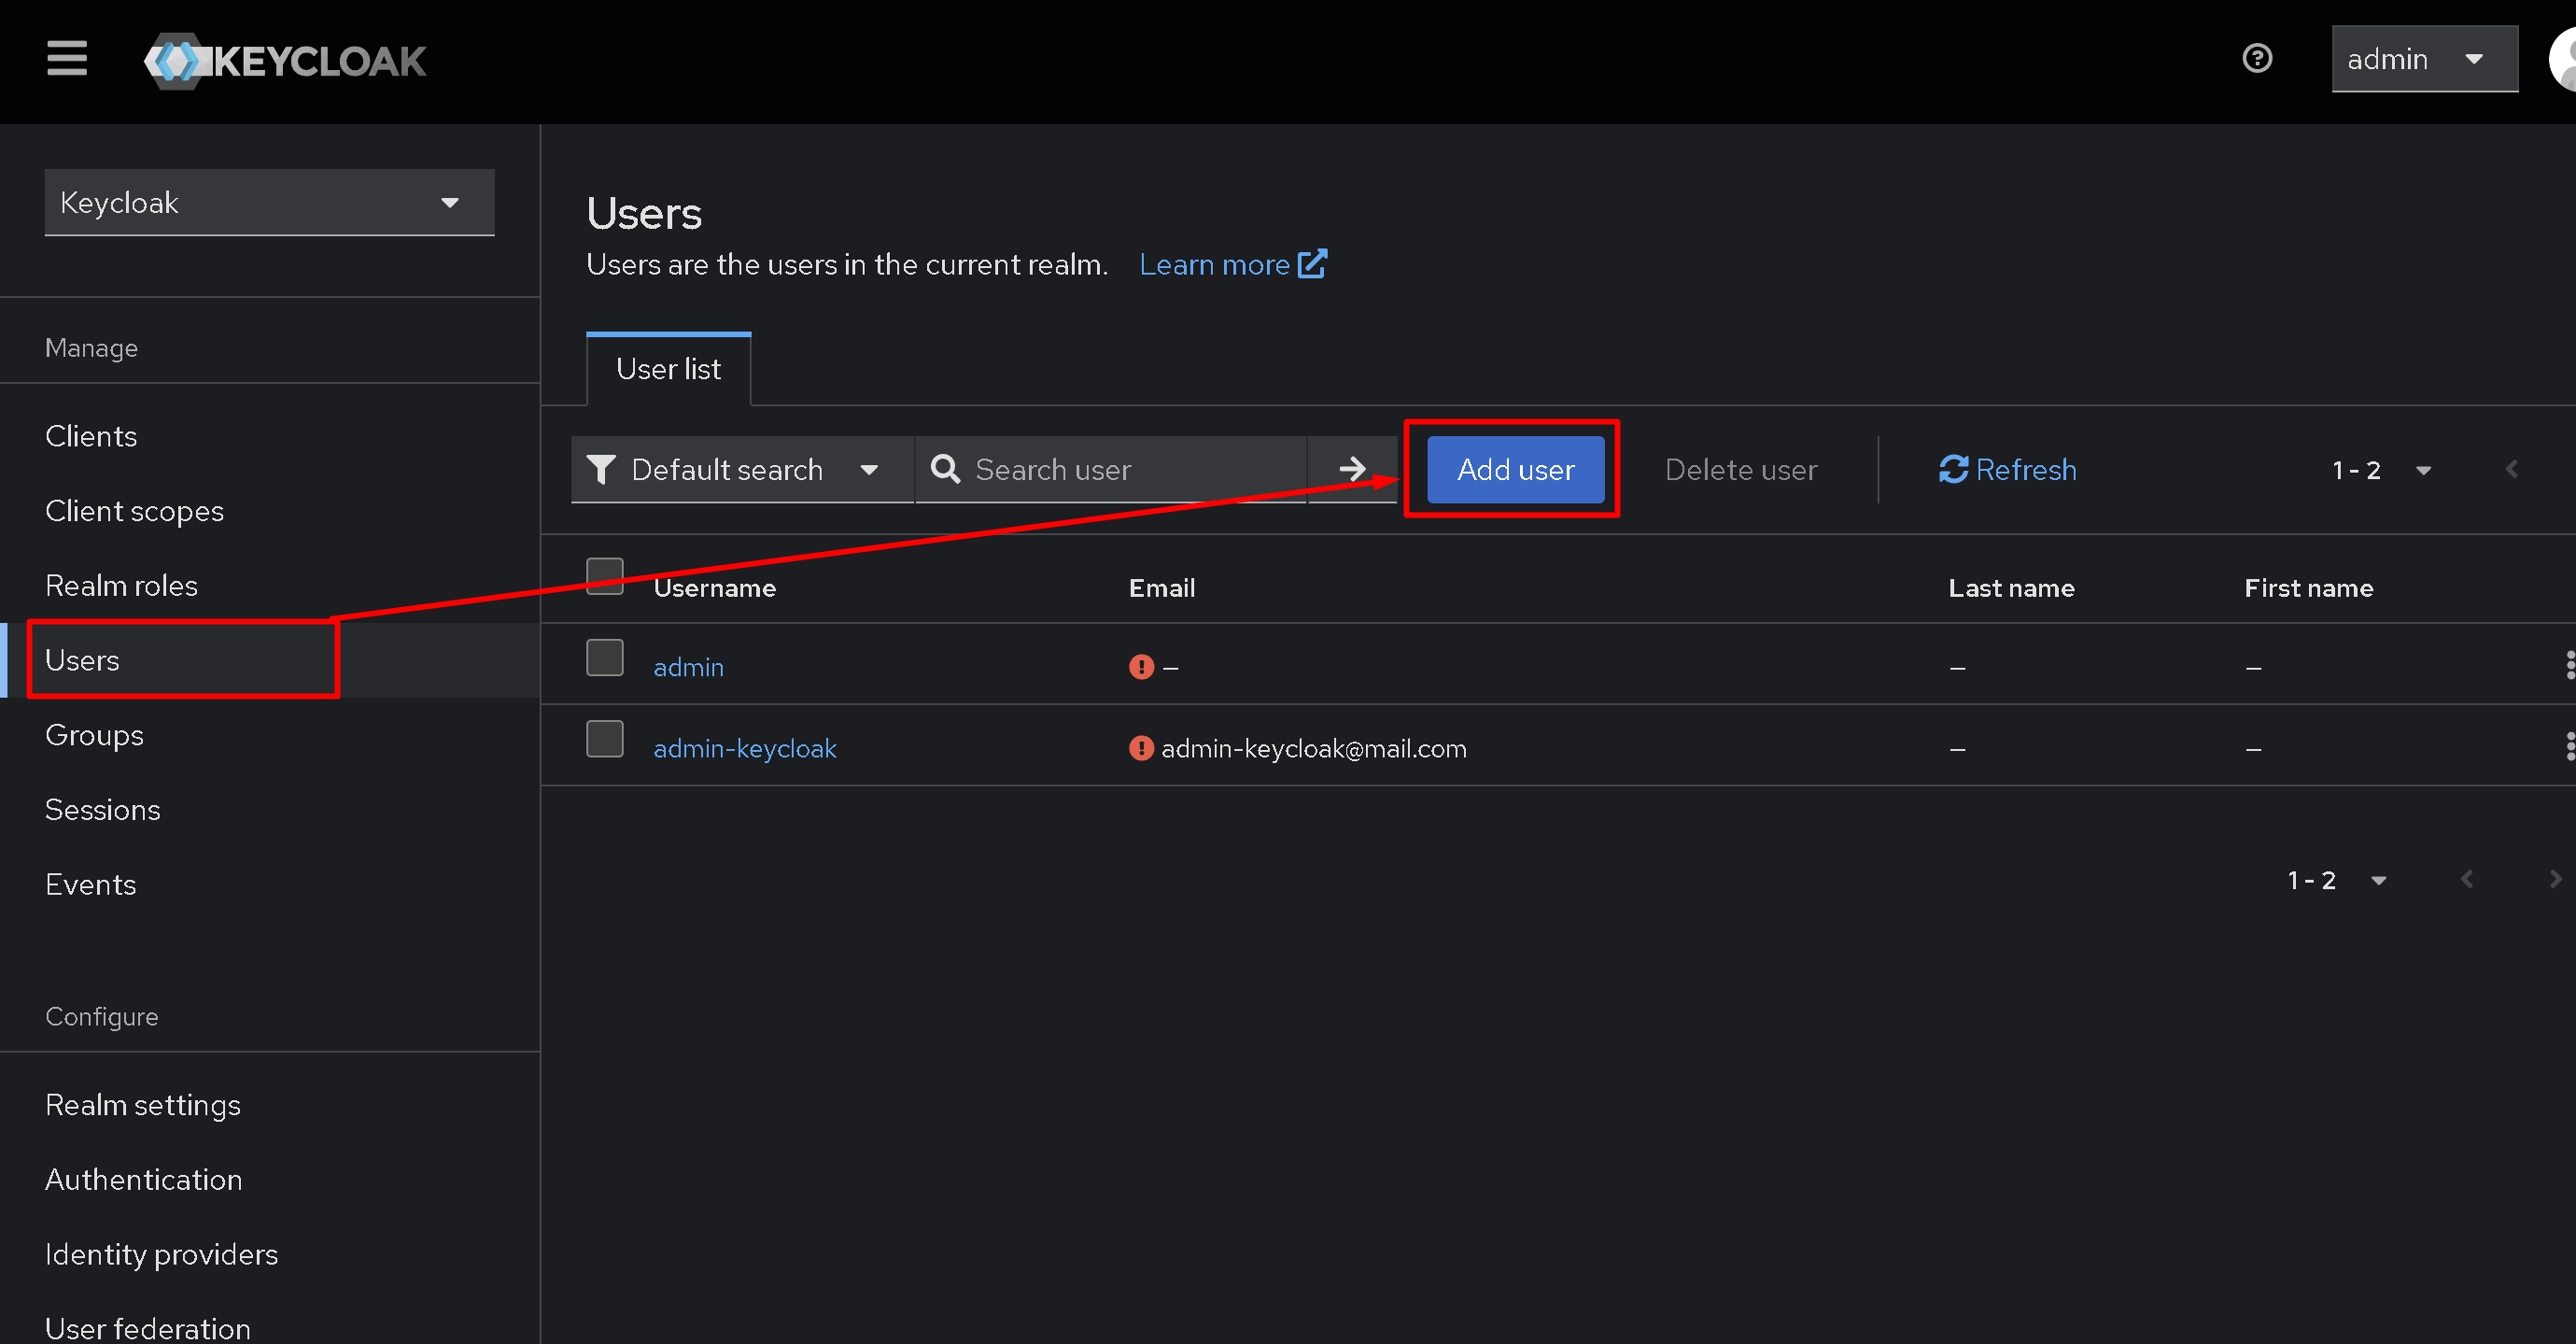
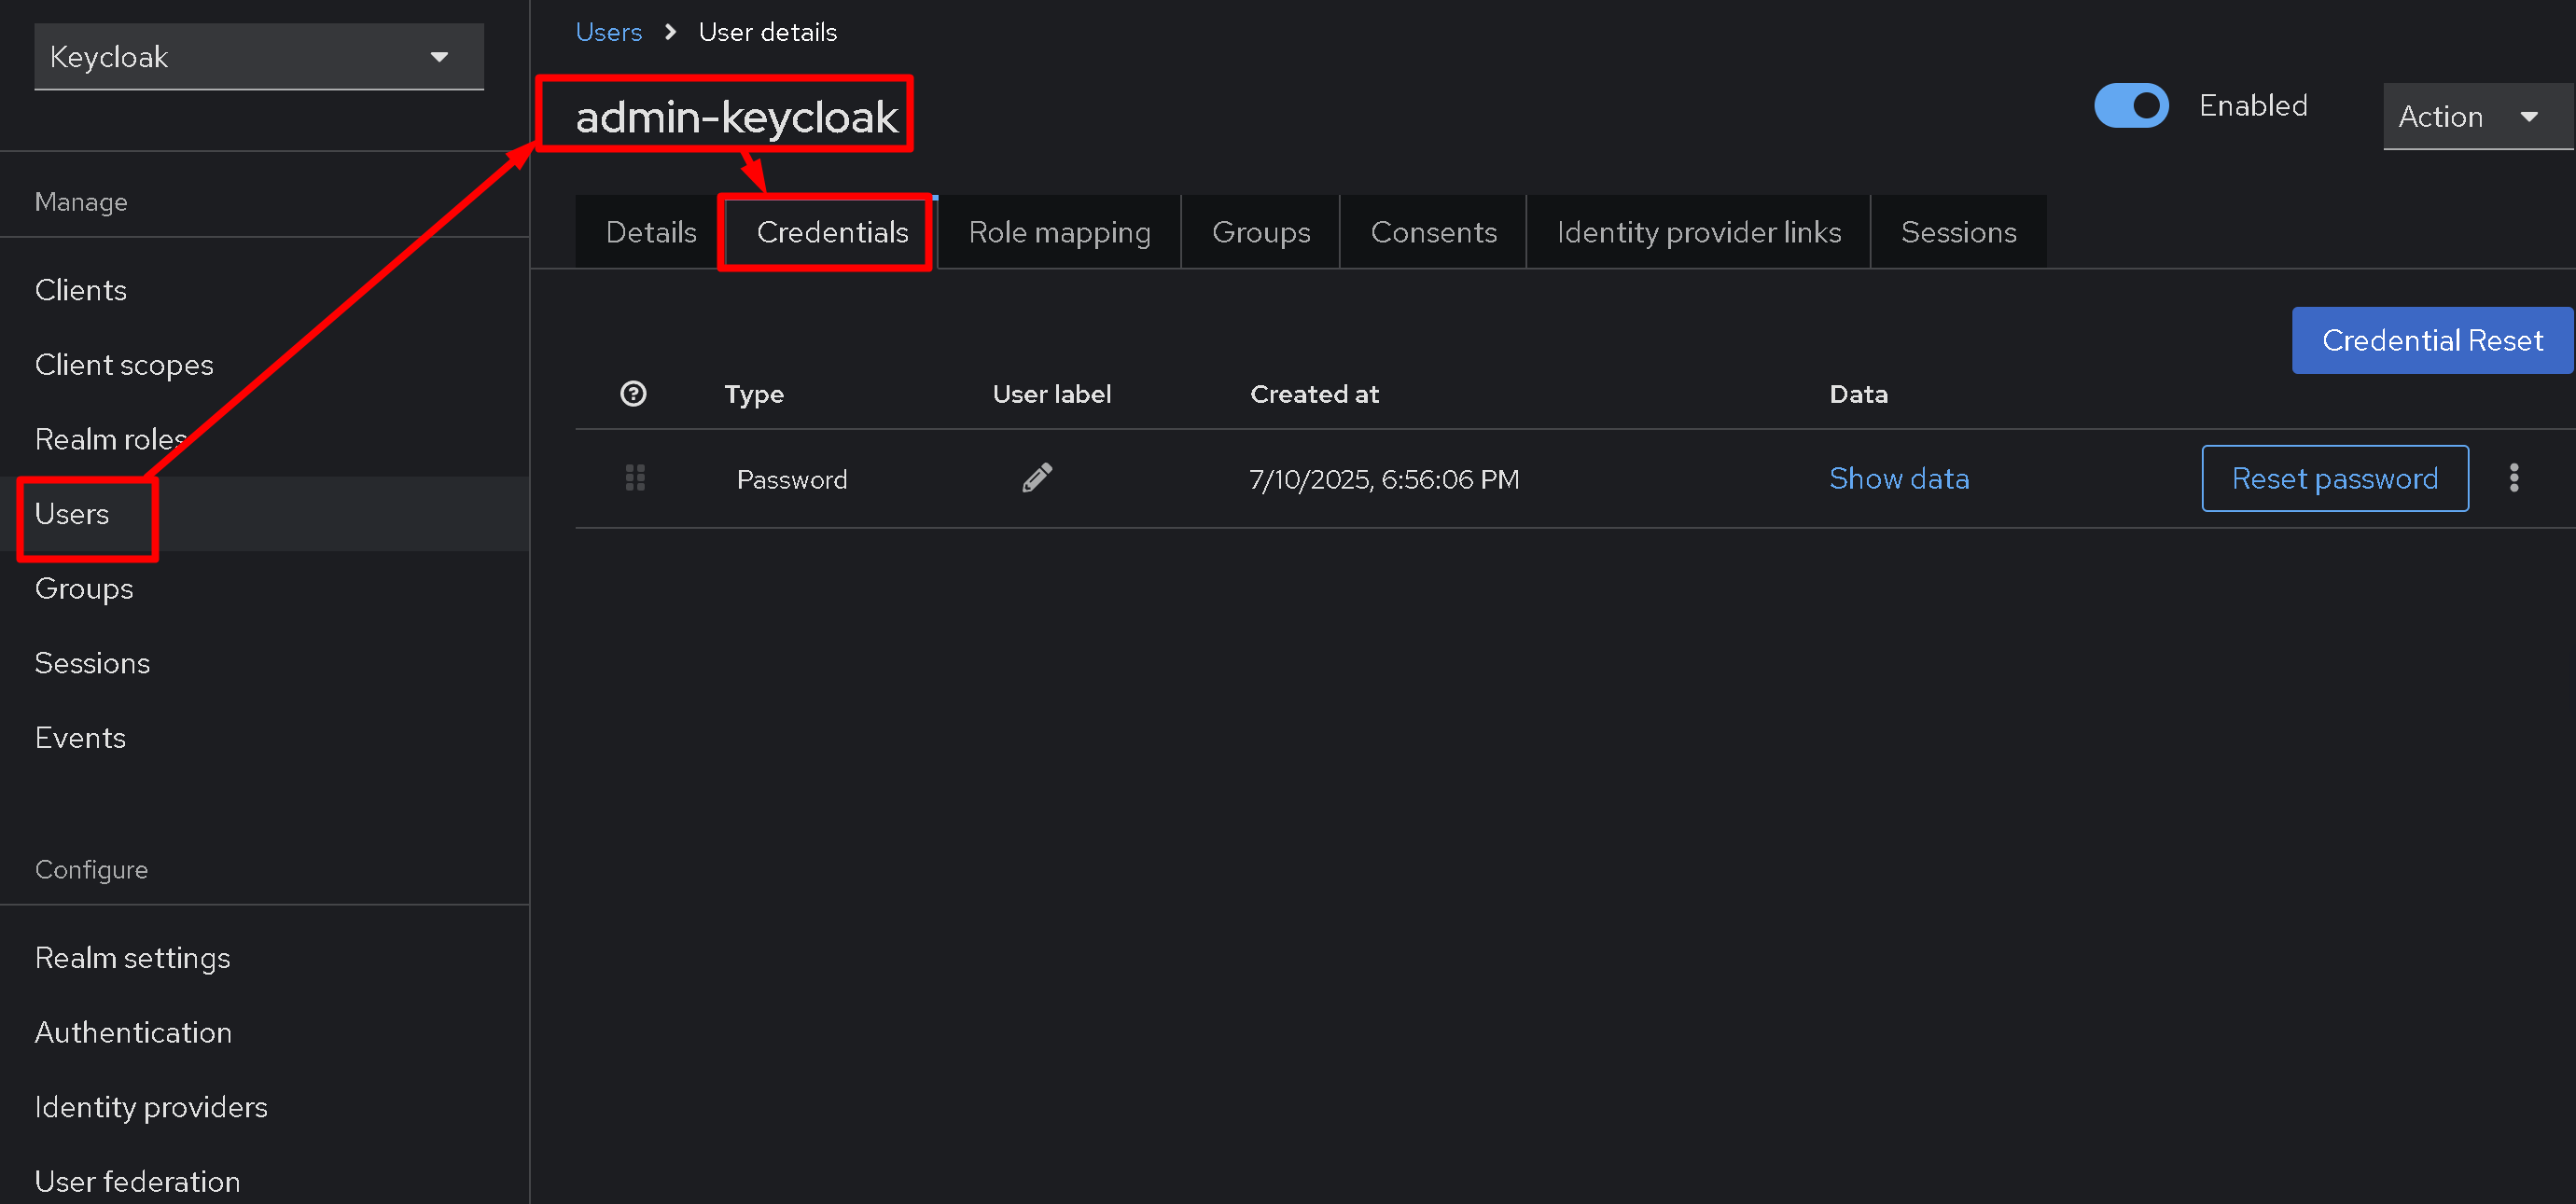
And of course, we need a test user, which will be used to verify authentication via Keycloak. Go to the Users section and click Add User.
The two parameters that we are primarily interested in and which are the most important are Username and Email. You can skip everything else and save the user immediately.
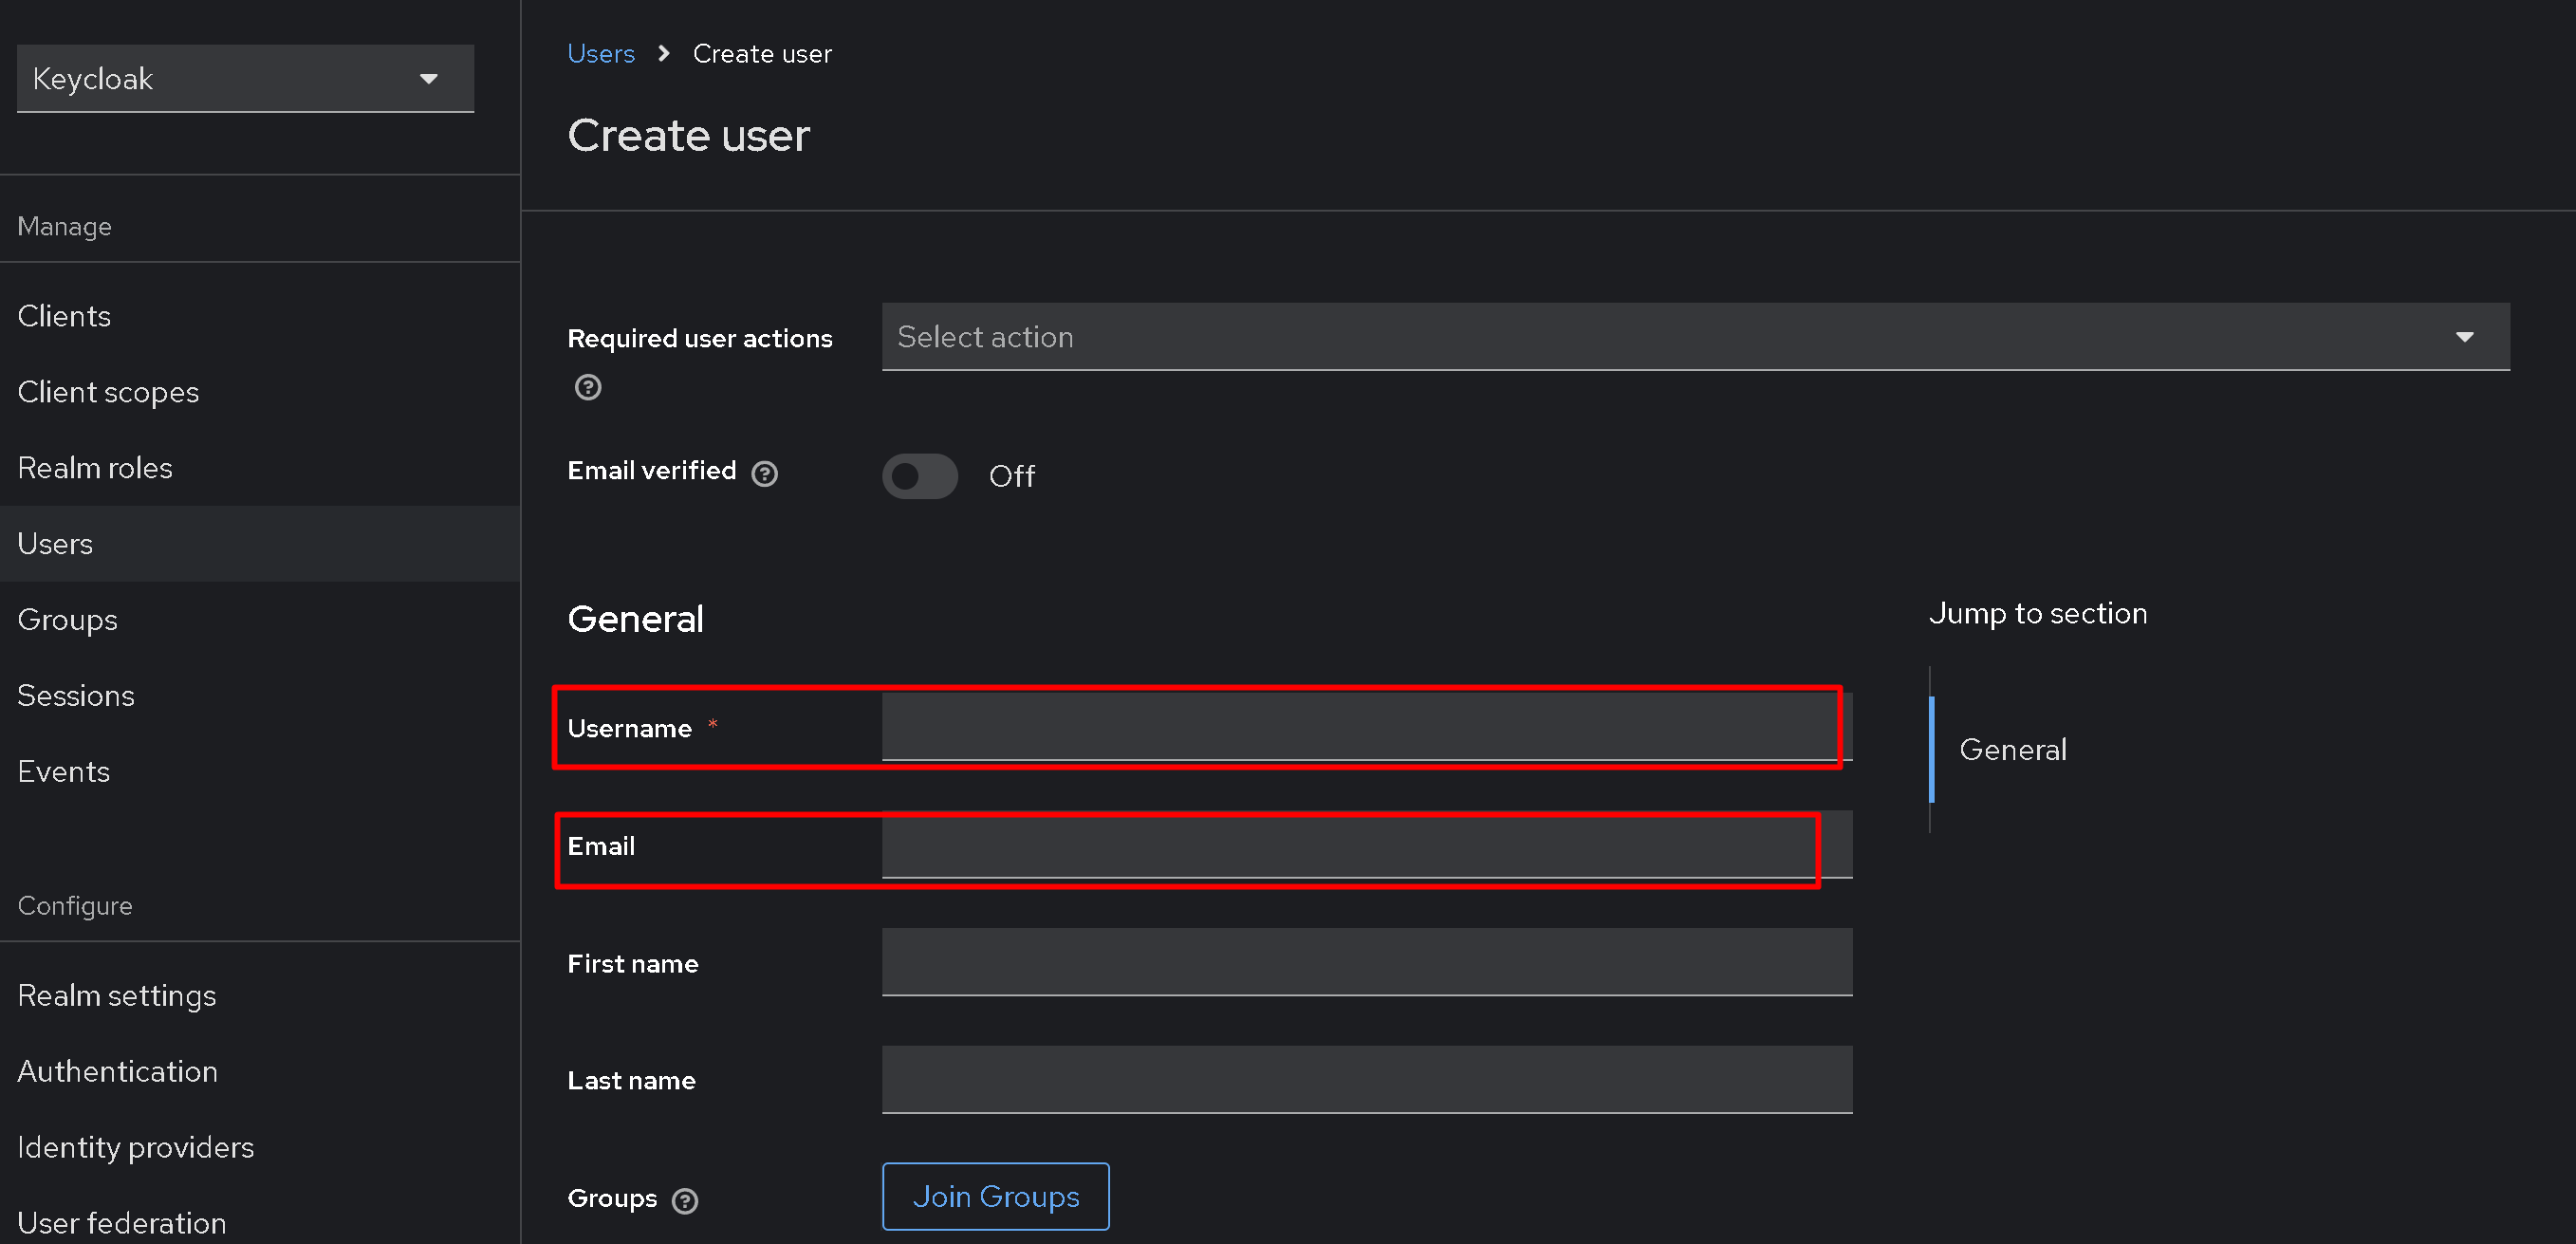
A user will appear, for example, with the name admin-keycloak. Its settings are now available to us, including creating a password in the Credentials section. The first time you log in using this user, the system will prompt you to change your password to a new one. I also know that the Keycloak authentication page can be customized, but that's another story.
So, I spent a few hours but gained experience installing and configuring Keycloak along with Nginx and subsequent authentication testing. I hope this experience will be useful in your research.